Written By Bobby. On Aug 29. In Shop Systems,Tool Reviews/ Events,Workshop Layout
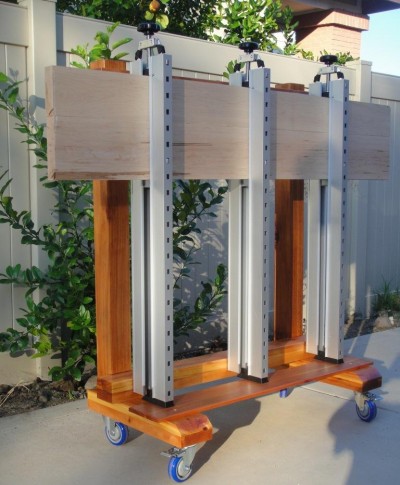
I can do large glue-ups, or even multiple smaller glue-ups and keep them in a space-saving configuration while drying. This leaves both more room and clamps available for additional glue-ups at the assembly table. The application of clamping pressure on all sides at once is a real time and stress-saver too.
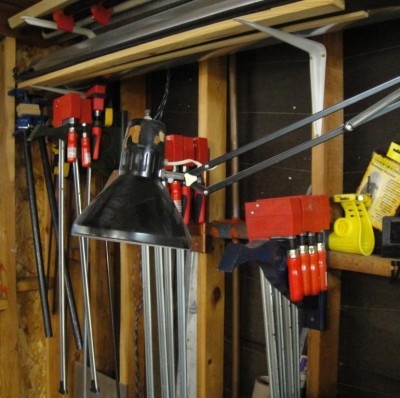
Not having enough clamps is kind of a woodworking running joke, but it’s annoyingly true way too often.
Think about the last time you glued 5 boards together edge to edge. You may have used 4 or 5 parallel cabinet clamps, then some small mini-bar clamps or C-clamps to make sure the edges align and the boards dry flat.
If you’re doing a batch of those, you’ll quickly run out of clamps, and that means waiting hours for the first batch to dry (which is why I like to have several projects running in parallel to occupy that time wisely).
In medium or large cabinet shops, you often see rotary style clamp racks to secure raised panel doors. By having a single fixture store so many doors in a small footprint, a lot of space in the shop is saved for maneuvering projects around, and walking from process to process.
For the smaller shop, this may not be practical (though you could make yourself a smaller version!) I’ve known about the Plano and Panel Max clamping jigs for awhile, but a recent project made me wanna get one. I had to spread the glue-ups out over several days because I didn’t have enough clamps, and these things were all over the place getting in the way of doing other things.
What is the most important thing in your shop? In your business? Time, of course. If your time is worth X dollars per hour, timesavers like this will pay for themselves.
In your woodshop design, after you have a good idea of your layout it’s an often forgotten thing to mentally walk yourself through some processes and discover what you wish were there. Examples are a mobile shop cart to stash and separate machined vs. unmachined stock, assembly fixtures, a separate finishing area sealed from dust, multiple assembly tables, scrap wood bins near your machines to throw cut-offs into, and a lot of other little things that aren’t whole workstations.
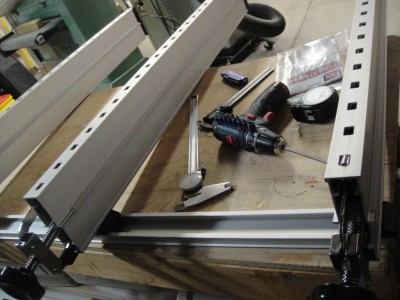
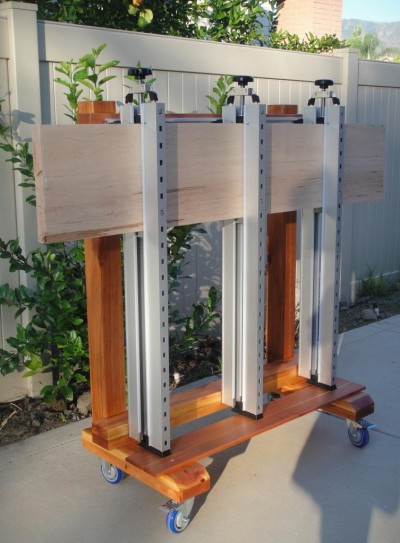
The basic system is a top rail off of which the clamps hang, and they apply pressure to the stack of boards via a handscrew, and the levers attached to that squeeze the vertical beams together to keep the panel joints aligned.
What It Does
This is a 2-in-1 clamp; it presses the board edges together while putting pressure across the panel surface to keep the edges aligned flat. It’s a series of aluminum beams with plastic shoes to avoid marring the wood, with a screw clamp at the top to apply pressure to the panel edges.
I got the Panel Max brand from Peachtree Woodworking, but pretty much the same thing is made by Plano. I just bought the Panel Max mostly because it was at The Woodworking Shows.
The cool thing about these is that you can put as many as you can fit in your shop to customize the size panels you can handle, and it adjusts to a wide variety of panel sizes easily by sliding side to side on a rail.
It’s meant to be attached vertically, so that means saving space. A lot of times I’ll have a bunch of glue-ups resting on the table saw, jointer, bench, and the floor. With this I can keep some of them out of the way.
Why I Wanted One
I wanted at least 3 of these to take care of most of my current needs, and I know that I can always get more and make another stand or put some on the back side of this stand. While I’ll still do some panel glue-ups using cabinet clamps, the Panel Max will be my go-to system. While this takes up little room, having too many of anything can get in the way unless you can justify it because you do tons of panel glue-ups at once.
Probably the biggest reason I wanted this is because it makes glue-ups really easy. Being lazy will get you further in life if you can make stuff to accommodate it.
All you do is apply glue to the edge(s) and stack them up in the fixture. Then, when they’re all in, adjust the height and clamp down. That’s it. No fumbling with clamps under the panel, wiping up glue off of your table saw or workbench (unless you’re lucky and have a dedicated assembly table), or fighting to get all the joints aligned to minimize surfacing after they’re dry.
You can also stack several glue-ups in there at the same time; just don’t apply glue to the edges you don’t want stuck together.
In a garage workshop or basement shop maneuvering room is critical, so to be able to move stuff out of the way really helps.
Plus, it’s an excuse to build something for yourself, and to experiment with a new finish or joinery technique and not ruin a client’s project.
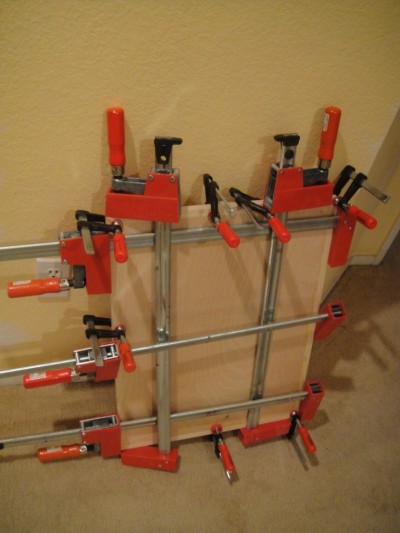
This glue-up is a plywood panel with hardwood edging; I could have used the Panel Max in conjunction with parallel clamps to clamp the side-edging.
Clamp Stand Criteria
Most people seem to bolt these to the wall (in fact the instruction sheet tells you exactly how to do this). This seemed to be too restrictive for an adaptable shop. I like to keep my shop as fluid as possible so I can re-set the shop for the project I’m focused on. I didn’t want wall space to be occupied by the clamp system and not available for a tool station. I also want this to come into my workflow, and not have to walk over to it with dripping boards.
That pointed me to making some sort of stand or cart for it. Here’s my list of requirements:
- Mobile, with double-locking casters
- Somewhat dis-assemblabbbble
- Stable (won’t tip over or move around unexpectedly while loading up)
- Variable (would allow for sliding the clamps side-to-side on the rail without restriction)
- It must look decent (no cheesy plywood, scrap-wood weekend look)
- It must look sturdy and beefy
- Minimize the space it takes up
- Be able to tolerate some glue spillage
WoodChip Tip: Use double-locking casters for your shop stations to get a more stable platform. These lock both the wheels and the swivel. This is especially critical for power tool station; it’s dangerous to have a tool unexpectedly slide on you while using it because the wheels swiveled around.
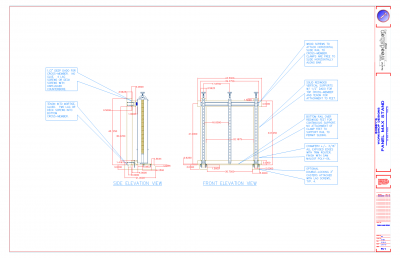
Here’s the plan. You can change it to have Panel Max clamps on both sides, or to accommodate 4 or more of them to handle larger table-top assemblies.
How to Design One of These
To start the design, I used the instruction sheet that came with it that detailed how to size wood rails to attach these things to the wall.
I just changed the “wall” into the cart posts. The rails are of the dimensions detailed in the instruction sheet to accommodate the clamp dimensions (so they are vertical).
Then, I put large feet on it so I had a stable platform to put the casters on. I wanted to keep it pretty minimal, just posts, feet, and rails.
To keep it from looking thin and cheap, I knew I wanted to use 3×3 sized material for the posts and rails. To make it so you could slide the clamps horizontally to adjust for different panel sizes, I put a bottom plate over the feet that spans the whole width of the fixture to give the clamps continuous support to rest on.
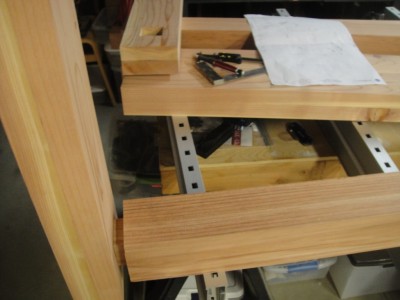
I may want to take it apart to some degree later on, so I made the rails fit into dados for support but attached them from the back with wood screws. I did decide to permanently attach the feet with a mortise and tenon joint and glue because it needs to be super strong.
For the other joints, the screws are counterbored so they don’t really get seen, and I put them in the back for the most part.
Click here for the woodworking plans: Panel Clamp Stand
WoodChip Tip: When gluing up the 4×4’s, I made use of Rockler’s silicone glue brushes, and now they have a glue spreader. It works using the same principals as a tile mastic trowel; it has notches so that you get a consistent thickness of glue.
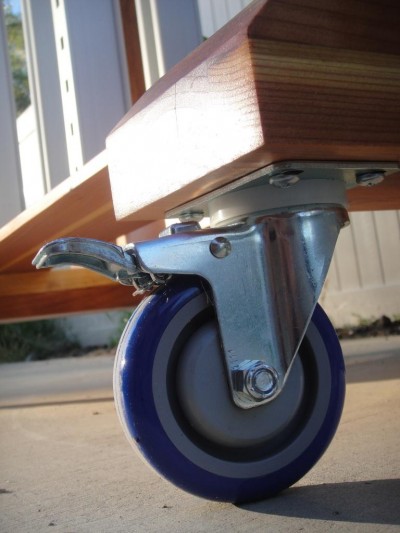
The whole point of not putting this clamp system on the wall was to save valuable wall-space as well as provide mobility. I can even wheel this thing outside if I want, and keep the shop more open while I’m working.
Woodworking Materials You’ll Need
I guess I coulda picked mahogany, but you know…keeping costs down for other projects steered me towards a softwood. I chose redwood because it’ll look nice when finished with the contrasting colors within each piece, plus I can get larger solid pieces without having to spend hundreds.
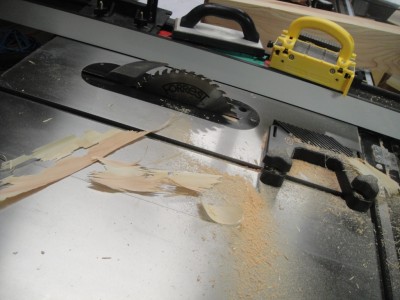
I bought these from a lumber yard geared toward fence contractors. This is something you want to be careful of. Some of the pieces had a fairly high moisture content, so much so that my SawStop slowed itself to a stop as a safety measure so it wouldn’t trip and ruin the blade. So I ran the rest of the boards in bypass mode, which means the “stop” mechanism was temporarily shut off.
After a bit of drawing, here’s the list I went to the lumberyard with.
- (2) 2×6 x 8 ft.
- (1) 1x4x10 ft.
- (1) 4x4x10 ft.
- Box of Deck Screws, 2”, 3″ and 4”
- TItebond III glue
- Sam Maloof Poly/Oil Finish
- Sam Maloof Oil/Wax Finish
- Finishing Rags
The lumber itself cost about $50, which isn’t bad. For this project, part of my goal was to use glue-ups to form the larger beams and feet to use all the lumber, and avoid having too much waste.
WoodChip Tip: I don’t have a moisture meter, but I want one now. Take one with you to the lumberyard so you can choose dry pieces.
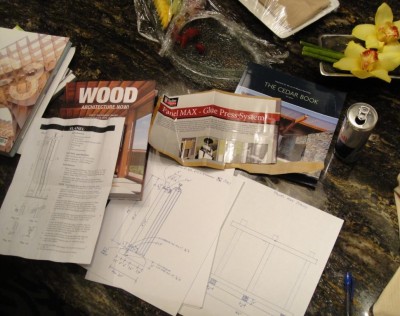
A sit-down planning session is all it takes to make awesome jigs, fixtures, shop stations, furniture, art pieces, or whatever you can imagine. For me, it helps to have some inspiration to flip through.
Create An Order of Operations
When I got home, I leaned the boards up against the wall and let them acclimate for days and did other stuff.
Two of the boards were pretty wet, which I discovered when I crosscut them to length. I felt the spray of mist being thrown from the teeth on the blade.
To start, after crosscutting them to rough length to get them to be manageable, I marked them with chalk to keep track of which board would become which piece.
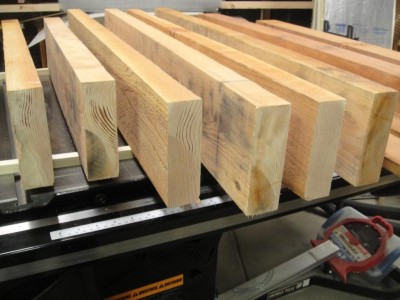
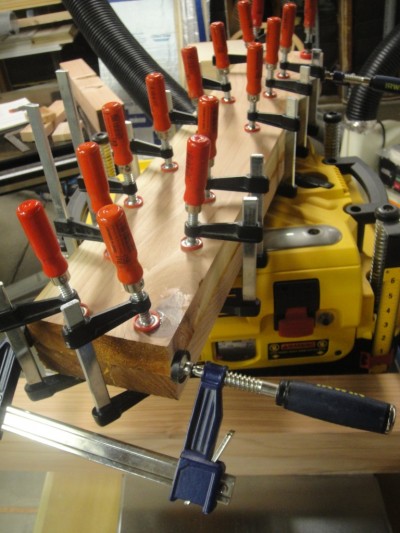
I ran two adjacent sides through the jointer, and then planed a third side to rough depth, leaving about ¼” for flattening after glue-up. I then glued and clamped all the boards that I needed together, of course using the jointed surfaces.
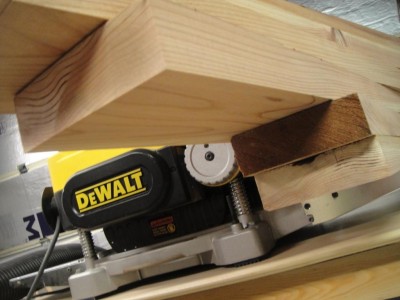
My machine cluster of the Jointer, Planer, and Table Saw worked great here; I was able to quickly mill all the boards S4S so I could get them all glued up.
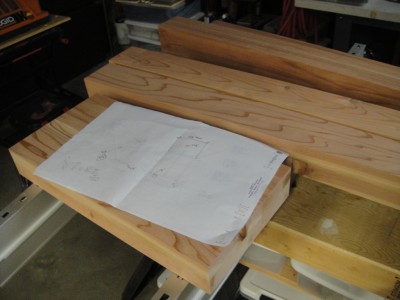
I like to have a plan, but ultimately that always winds up changing and getting marked up while in the shop, which is fine. You’ll encounter some things you didn’t think of during design, but that’s how you learn for next time.
When the glue-ups were dry, I re-jointed two sides, then planed the third side to the final depth, so that the gluelines were flush. From there, I used the table saw to cut the 4th side.
Now, I crosscut everything to the final length.
For the joinery, I needed to switch to a dado blade to cut notches for the rails, and to cut tenons on the posts to fit in mortises on top of the feet. Also, I used the mortiser first so I could sneak up on the right tenon size.
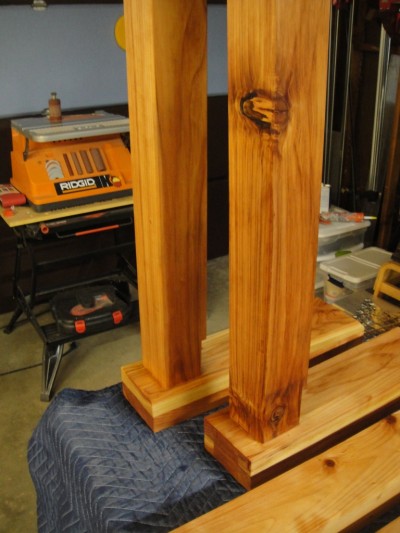
After dry fitting (multiple dry fittings to sneak up on a tight fit for the joints), it was time to apply glue to the tenons and clamp the feet to the posts, using a 90 deg. clamp fixture to keep things straight while the glue dried.
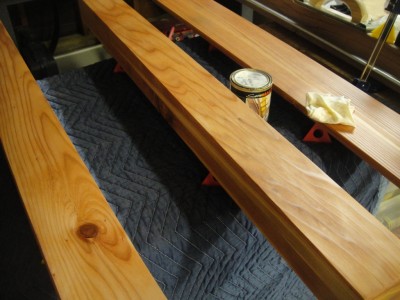
Before final assembly, it’s easier to finish all the individual parts. Make sure that where the parts fit together doesn’t get any finish on it while assembled.
After final assembly, I’ll apply one more coat of the Sam Maloof Oil/ Wax Finish because I’m sure I’ll have slightly roughed it up at that point.
So there you have it, a permanent investment in your shop.
Here are the basic steps:
- Let the wood acclimate to your shop
- Crosscut to rough length so they’re more manageable
- Milling: Make 2 adjacent sides flat and 90 deg. to each other, and plane to rough dimension
- Glue up the jointed faces together to make all the parts (posts, rails, horizontal bottom support shelf, and feet)
- Mill the glue-ups to final dimension on all 4 sides
- Cut the mortises on the feet
- Crosscut the parts to final length, but leave wood for the tenons
- Machine the dados and tenons while the dado blade is in
- Dryfit the joinery
- Chamfer select corners to soften some of the edges, and the top of the posts
- Glue the feet to the posts and clamp
- Pre-finish all the parts with whatever you’d like to experiment with
- Do the final assembly, including fitting of the Panel Max clamp rail, and the caster wheels
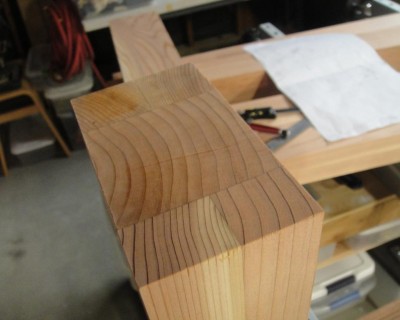
Because milling up boards and gluing them up was happening anyway, I decided to use all available lumber to make the larger pieces.
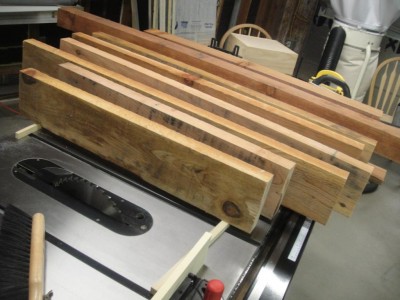
By milling your own lumber, you can buy pretty rough stuff to start, and clean it up on the jointer and planer.
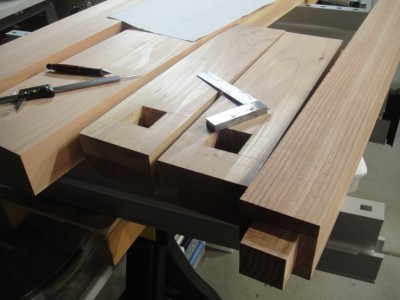
Having a mortiser came in handy; these weren’t through mortises so the depth-stop made it easy. I did the mortises first, then used the dado blade to sneak up on the right fit.
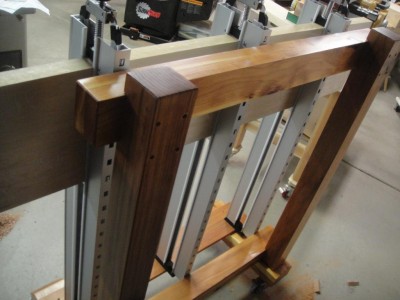
As part of the assembly, I used deck screws on some joints so that I can take this apart if needed. They’re counterbored so they look nicer. If you don’t want to use screws, you could use a sliding dovetail joint. Or you could just plug the counterbores and never take it apart. There is a dado recess for the cross-brace for added support and to help prevent racking.
Consider This
Some of the lessons learned during this build will apply to my next project: a floating maple platform bed (for myself this time).
- Check the moisture content of the rough stock you buy, preferably at the lumberyard
- Wait longer than a few hours before taking off clamps on thick glue-ups, especially high moisture-content boards. When I removed the clamps after a few hours, I came back the next day and saw some glueline separation.
- Be careful not to have a cart that’s 20 ft. long; there’s a practical limit to its size. You could make this double-sided, which I can do by disassembling it later if I want. For now this meets my needs.
- Leave your rough dimensioned parts large enough to accommodate final machining; I had to adjust a few of my drawing’s dimensions because I was a bit off on one of the feet.
- Make sure to wipe off all the oil from every face and corner, and do a few walk-arounds using raking light (light aimed at a shallow sideways angle so you can see any surface imperfections). I left a few drips to dry and had to scrape and sand those areas which cost a few hours of time.
- Do a good job taping off parts of the wood you don’t want glue squeeze-out on; when it dries completely it’s a pain to make it look good, especially on inside corners.
- While waiting for each of the coats of poly/ oil to dry, I couldn’t do other dust-producing things. So, I may accelerate the design of a separate finishing/ lumber storage outbuilding. Finishing is best done in a separate space so you don’t waste shop time.
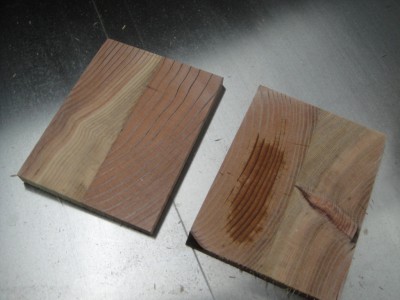
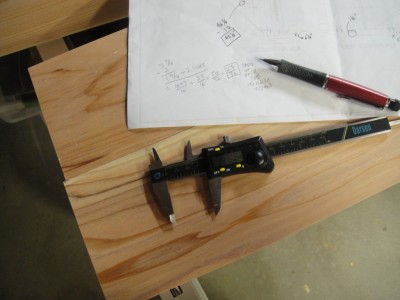
Here you can see the moisture content of the board on the right = no bueno. I wasn’t real happy about that...I’ve since found a better lumber supplier.
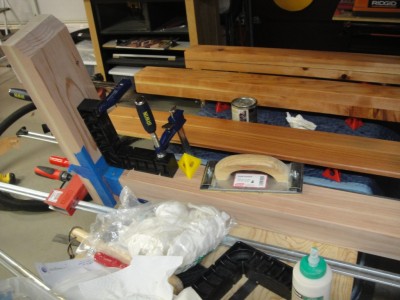
Gluing up the posts to the legs; I decided to make this a permanently glued part, and everything else can be disassembled.
I’ll be using this clamp fixture on the glue-ups for the 2” thick arch supports on the bed project. There will be a total of 4 large glue-ups, and I can probably fit 3 of them at one time. Remember you don’t have to put glue on every edge, so that means you can put several glue-ups together if they can physically fit in the jig.
It’s going to make things flow much better. I can stack boards in there, clamp them tight, and wheel it out of the way while I work on other things.
Related Articles:
Design the Bottlenecks Out of Your Woodshop Workflow
Saving Money on Tools Will Cost You
The Finished Panel Max Stand
Click here for the woodworking plans: Panel Clamp Stand
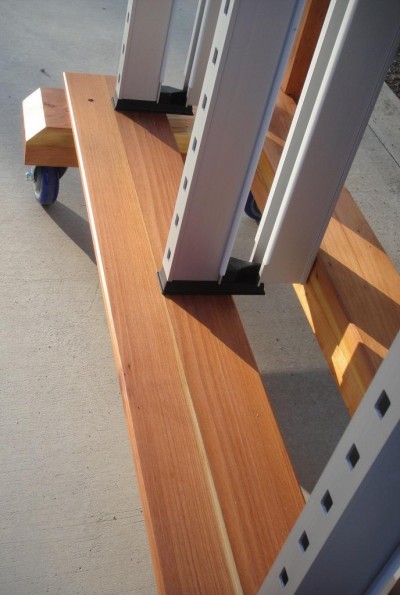
Close-up of the support bar that lays on the feet; this supports the outer clamp bar; as you put thicker material in the clamp, the outer clamp moves toward the front of the cart, and must be supported up to the clamp’s capacity, which is about 5” thick boards.
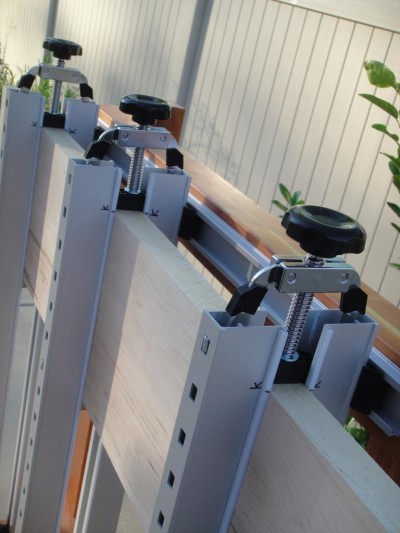
The top clamps; you just keep them in the same position; what you move is the bottom support for different sized glue-ups. In other words, the top of the boards is typically near the top of the clamp system in all cases.
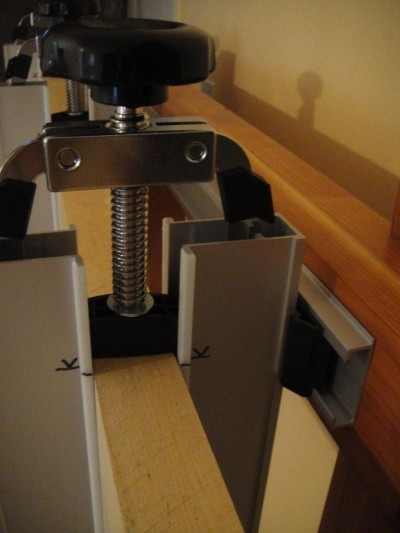
Here you see where I’ve marked the location of the top of the board. This serves as a guide for me when I’m loading up the clamp. This mark is where the top of the board should always sit (approximately, of course), and I just move the bottom support upward to carry the bottom of the glue-up.
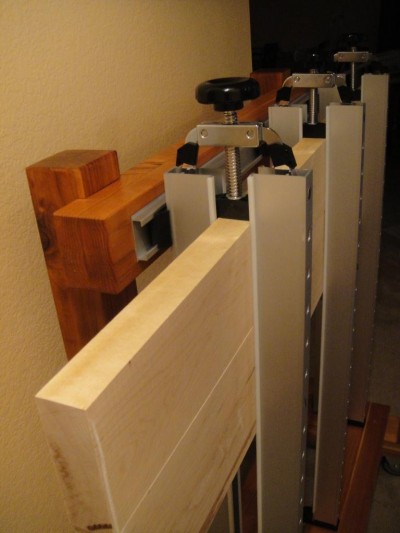
When you put this whole thing together, do just one dry-fit to practice how you load up the clamps, and that’s all it takes to figure it out. Pretty easy.
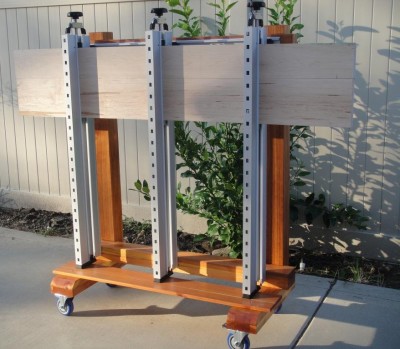
With these wheels, I can roll it outside on a nice day while I’m doing other stuff. This keeps it out of my workflow and makes the shop feel more open. I do have an out-of-the-way place I park it so it’s not in my typical workflow. But it is near the assembly table where I do my gluing so I can easily roll it over to where I am, apply glue and put in one board at a time.
For more guidance in assembling your Workshop Design, click on the Starting? Go Here! category and read those first.
Connect with me on Facebook, and follow me on Twitter for more ninja tips to Optimize Your Woodshop!
And, if you’re on Twitter, be sure to follow #woodchat every Wednesday night, at 6:00 pm, PST.
Gotta get more clamps,
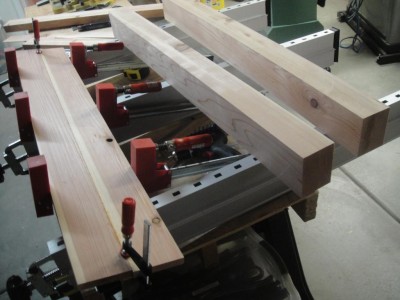


 How I went from a cluttered and disorganized shop to a super-productive layout with a convenient dust collection and electrical set-up.




Very nice work. Thank you for sharing it.
Dan