Written By Bobby. On Feb 09. In Design Process,Starting? Go here!,Workshop Layout
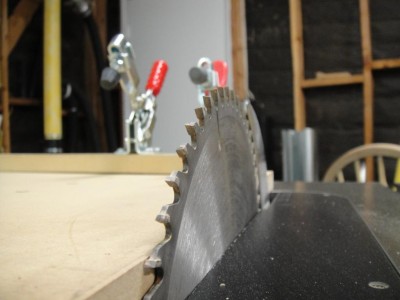
I knew from the start that my shop had to have certain capabilities so that I could make the things I wanted. This was my starting point of the design.
3 Questions You Should Ask Before You Even Start
- Do you think of your whole shop as a tool?
- What do you want your shop to do for you?
- What do you need to do in your shop, both for now and the future?
If you can answer these questions you have the basic strategic direction you need to move forward in designing your dream shop.
The planes you use are shaped the way they are because someone asked what they want the tool to do, how people are going to use it, and how will they be able to maintain it. If you think to yourself how you are going to use your shop in the next few weeks and how you imagine it’ll serve you in 5 years, you can design a shop with the layout, comfort features, and infrastructure that will do all those things in a convenient way.
In this article, I’ll walk you through my thought process of how I arrived at my current layout.
What Your Shop Can Do For You
Right now, maybe you enjoy woodworking as a hobby you do after work or on some weekends. Perhaps you imagine yourself getting good enough to submit furniture to galleries or selling it online. Maybe you would like to get commissions to make chairs and tables for a library, benches for a museum, or a house full of furniture for high-end mansions.
To do those things you’ll need certain tools, but maybe you don’t need a $4000 cabinet saw at the moment. I only buy tools as I need them, but I reserve space in the shop design for the tools I know I will need as my work evolves.
First you’ll want to let your mind wander for a bit to help you design your shop around your current needs and for the near future. This will generate a list of requirements for you, and from there all you need to do is organize that list (mindmap and outline it) and just start designing by sketching.
Starting With a Layout
I started with the shop layout, because one of my main issues was lack of good workflow in the past, which slowed me down and made for a tired afternoon in the shop. I remember building several picnic-table style benches out of redwood in my apartment, and it was a real pain, and it took four times as much time and effort as it would now with my current shop.
I also want the ability of taking on a large commission and sending it all through a smooth production run, even with different pieces being built at the same time. If everything is laid out to handle multiple-piece production, and I leave enough room for smaller artistic studio art furniture, I’ll have achieved the main dream functions for my shop. Of course, I want to do all this year-round in comfort, so my shop envelope and heating/ cooling requirements are on the list too.
The layout of a shop full of tools seems like a mysterious subject at first. Without some guidance it’s hard to know where to start. There isn’t much in the way of good content out there that tells you how to go about an ideal layout, other than some advice about following your workflow. But, once you do that, how do take it to the next level? Putting things in the right order really isn’t enough.
Do More Than Just Putting Machines In A Certain Order
After tons of research in magazines and online, and a few years of experimenting in my different sized shops, I amassed a list of shop design principles to use as a guide. Often times, magazines don’t comment much about the shop layouts of others. This is in part due to the fact that each woodworker is different and has their own workflow, and partially because they’re not keen on criticizing a shop they’re showcasing.
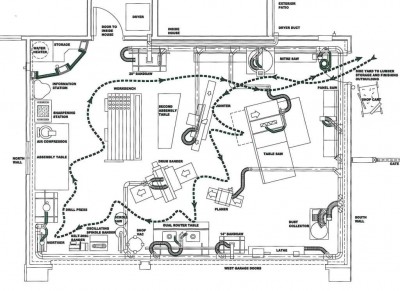
The workflow path indicated here is one of several I considered. Also, realize that you’ll start a shop session somewhere in the middle of this workflow most of the time.
Without quizzing the woodworker about how he usually works, you really can’t say that their shop layout is not optimum. When I read an article about someone else’s shop, I try to read between the lines and study the photos to figure out how he arrived at the placement of everything. What I’m really after is obtaining a set of principles or rules to help guide me through the thought process.
I started with my first shop in my apartment bedroom, then moved to a one-car garage, and on to a 3-car garage. Before I bought the house with the 3-car garage, I drew up a design assuming I would have a 2-car garage, which you can see below.
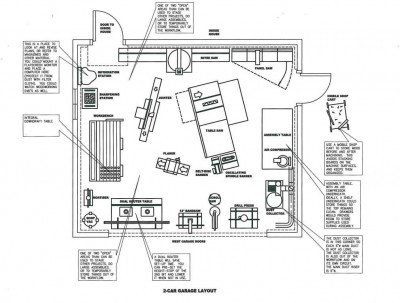
This 2-car garage was designed when I wasn't sure what type of space I'd have next. But, it was easily adapted to a 3-car garage shop later on.
I went all-out in my design when I decided to buy a house. I was getting sick of the poor layout and conditions in my previous shops. I found myself dreading going out there because I wasn’t getting much done both due to a disorganized group of tool stations, and a lack of comfort control. I also knew that going out to the shop and starting to move things around wasn’t going to cut it. I just needed to sit down and do as much research as possible and think deeply through everything. Start from scratch and give yourself a bit of time.
So, where to start exactly? What is the actual action step I did first?
I started with a list of all of my current tools and future desired tools. Once you have that, organize each one into categories based on the type of operation. I divided mine into Stock Breakdown, Milling, Shaping & Joinery, Finish-Prep (Sanding), Assembly, and Finishing. Every tool was under one of these categories. You may have one tool under two categories, such as your table saw (used for milling and joinery).
See the posts Revolutionize Your Woodworking Enjoyment Part I, Part II, and Part III for a more detailed walk-through of each type of woodworking operation and the tools used for each.
Now you’re ready to think through your workflow. I started with the assumption that I bring lumber in from the outside lumber outbuilding or the lumber rack in my shop. From that point, I usually either trim boards to length or break up plywood (Stock Breakdown). Typically I use my miter saw and circular saw with sawhorses for this. In the future, I plan on getting a panel saw to make quick and accurate work of breaking down large 4 x 8 sheets.
After cutting things to rough size, I take that stock and mill 4 sides square (S4S) or further dimension the plywood panels. This involves my table saw, jointer, the planer, and sometimes my drum sander.
After that, I start paying attention to the joinery and the final shape of each piece. I’ll use the bandsaw, router table, bench tools, the oscillating spindle sander, mortiser, drill press, and the table saw.
Once the parts are shaped for a good fit, I sand, plane and scrape all the parts before final assembly. I find it much easier to do this now rather than after assembly. I hate sanding inside corners.
Once assembled, I often set it aside to dry and work on something else. This is how I came up with the idea of leaving an open “blank” area in the shop for staging glue-ups and miscellaneous finished projects out of the way.
After I pull apart the clamps, there is always some final sanding and touch-ups to do before finishing. Then I start the multiple-coat and sand-between-coats dance.
Think in Groups
Each of the types of operations, Stock Breakdown, Milling, Shaping & Joinery, Finish Prep, Assembly, and Finishing that I typically go through for a project got their own areas, arranged in a cluster best suited for my way of working. For example, in my stock milling area, I arranged the table saw, jointer, and planer in such a way that my typical S4S process flows with minimal walking. I can stand at the jointer and run the boards on one edge and one face, then turn around to the table saw and rip a parallel edge, then go to the planer and catch the final face to make it parallel. Then, if I want, I can use the drum sander to do some final clean up to minimize hand sanding. Then I usually put all these pieces on the workbench for shaping and joinery.
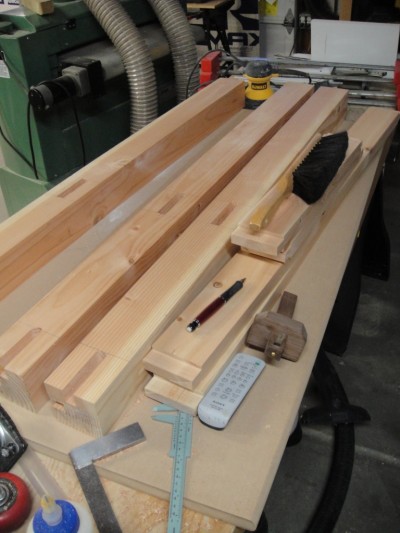
After milling the parts, I spend most of my time at the workbench measuring and marking each piece, and tweaking joinery with hand tools.
Some parts will get mortises, some parts will get prepped for a panel glue-up, and other parts will get marked for dovetails. So from my workbench I take some parts and go to the router table or bandsaw, or I might go to the scroll saw or oscillating spindle/ belt sander. I’m still tweaking this area to make the most use of this shaping/ joinery area while minimizing how far I have to go back and forth between stations.
If I do a glue-up, I can use the secondary assembly table behind the workbench to glue and clamp up the boards and let it dry. Later, I’ll come back and scrape any excess glue squeeze-out and run it through the General drum sander. From there I may need to go to the table saw to do some final dimensioning. Now this does mean that I go from the table saw all the way back to the workbench, but this doesn’t occur often enough to be a big deal, and I don’t want to sacrifice more common operations by moving the table saw closer to the workbench.
What’s After Workflow?
It won’t be too long before you arrive at a layout that functions for your most common order of operations. There is more than one way to do this, and you’ll find yourself moving things around on paper a few times. I did this after going to sleep and looking at it the next morning, and questioning it. But, every time you move something you could be sacrificing something else, so before you give your stamp of approval walk yourself through some typical projects again. Then take your sketch in the shop and mark it up while play-acting with some boards. I did a project on purpose just to verify if this is would really work.
It’s important to have good workflow, but there are some other things to think about before you start placing outlets and dust collection ducts.
I found it frustrating to not have any place to plop glue-ups or partially finished projects besides on my table saw or workbench. So now I made sure I set aside tow “open areas” in the shop (denoted by the circle on the plan you see in this article) that is out of the workflow.
I realized that there were things that don’t want to be “in the workflow” because they are necessary but not routine tasks. These include sharpening, construction tools, TV/ DVD player, Information Station where I keep books, magazines and plans, and because I don’t do a lot of turning, the lathe.
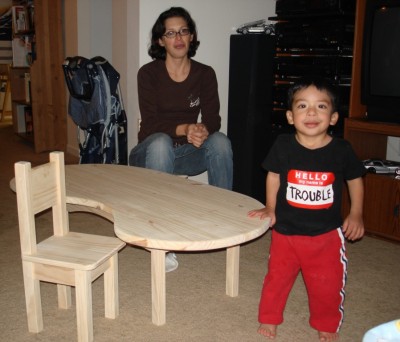
Don’t forget that the primary purpose of your shop is to make stuff, either for clients, yourself, or your friends, and even with your friends. In this case for my friends Joe and Andrea and their son Tyler, where the most awesome part was Andrea helped with the build.
Do you have enough room to walk around? You don’t want to cram machines too close to each other. Leave room not just for infeed/ outfeed but for yourself as well. What I do is take a 24” diameter circle to represent myself, and move it around the plan and make sure I won’t feel like I’m in a cluttered environment.
I want to make sure that I keep unnecessary things out of the shop, especially if I don’t need those things very often. The bulk of my lumber will be stored in an outbuilding, the garden tools will go in a separate shed, and finishing (especially spray finishing) will be done in a separate small outbuilding.
I left room for future tools that I know I will eventually need, such as a 20” bandsaw, panel saw, and scroll saw.
I opted for two bandsaws, one for resaw and one 14” for general stock shaping. If I had more square footage, I’d have two table saws as well to minimize set-up time. I also plan to construct a dual router table for the same reason (for example one router can have a chamfer bit set up and the other one can have a straight bit for cutting dadoes, and I raise or lower them as needed).
Infrastructure
Once you have confidence in your layout, you can begin to think about your electrical layout (# of independent circuits and outlet locations), and the dust collection network (main duct routing, and branches to each machine). I designed my layout, and soon after that installed a lot of the electrical and dust collection system. After awhile I decided to change a few things in my layout so now I’m in the process of changing some outlet locations and adding some additional 240V outlets, and relocating a few of the dust collection drops, as described in Fast Fixes for an Under-Performing Workshop Layout.
WoodChip Tip: Don’t forget to have a spot to sit and think or rest for a bit. I found that if I didn’t have a chair or stool in the shop, I tended to go in the house and watch TV for a little too long.
I think you’ll have a lot of fun trying different layouts, and imagining yourself in the future doing a more advanced version of what you’re doing now. If you have a shop that naturally fits an advanced level of woodworking, that’s what you’ll tend to do.
Click here for my tool organization for each process:
Woodshop Tool & Station Organization PDF
Connect with me on Facebook, and follow me on Twitter for more ninja tips to Optimize Your Woodshop!
Gotta get more clamps,
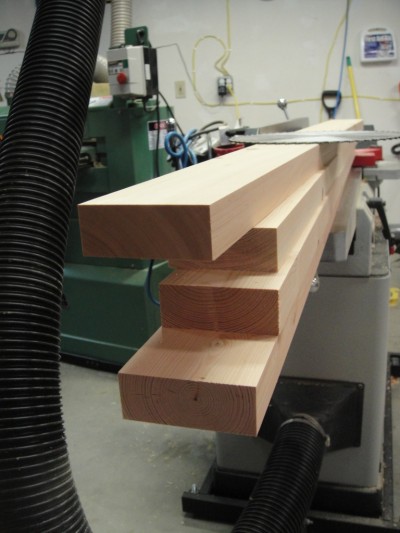
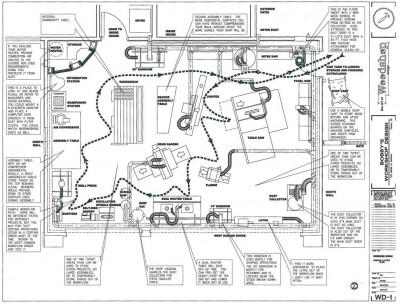


 How I went from a cluttered and disorganized shop to a super-productive layout with a convenient dust collection and electrical set-up.




I followed after reading it…it’s really useful and great! It was helpful for my project on smart woodworking tools. Thanks a lot.
Thank you so much for all this information!! I’m planning a makerspace with wood workshop in my university and it will be very helpful! Keep doing that, please!