Written By Bobby. On Nov 01. In Design Process,Starting? Go here!,Workshop Layout
Wherever I lived, I made sure I set up shop, even if it wasn’t perfect. But I tried to make it as perfect as I could for the space.
Are you letting your current situation stop you from woodworking? How long are you going to let this last? I say use your creativity to maximize your current location while planning for an ideal future one. In fact, make it your next project. I think I had just as much fun designing my router table as I did making my friend’s shoe cabinets.
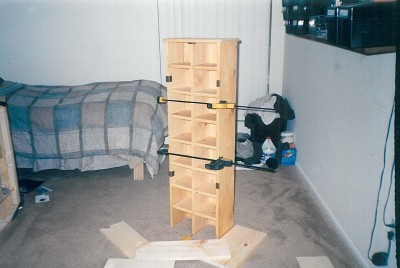
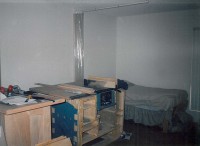
I started woodworking after college in a second story apartment bedroom. I didn’t care where I was, I needed to create. Not being able to stop fidgeting about making stuff, I made a list of the problems to overcome and figured out work-arounds for each one. Once I had the overall picture of what the problems and possible solutions were, and how they affected each other, I laser-focused on one issue at a time…and ignored the rest until it is done.
Part of doing this is to know what your ideal shop criteria are. These were laid out in previous posts, “Revolutionize Your Woodworking Enjoyment, Part I”, “Revolutionize Your Woodworking Enjoyment, Part II”, and “Revolutionize Your Woodworking Enjoyment, Part III”. Once you list them for the type of woodworking you do, you will find that your current location has some drawbacks for things like sound control, open space, temperature control, etc. But you can implement a good number of your criteria at least well enough so you can actually make things.
My Work-Around Process
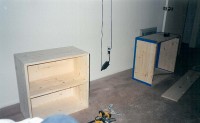
Living in a second story apartment, my biggest concerns were getting complaints from neighbors, and getting kicked out of the complex. Not only were there issues of the actual sound going through the walls and floor, the vibration of a table saw would certainly not help the downstairs neighbor’s opinion of me. My next problem to solve turned out to be controlling dust.
My proposed solution was to only perform machine-related woodworking while the neighbors were away. But there could be times when one of them returns home without me realizing and the music of my whirring saw could draw fire. So I still wanted to minimize the noise as well. My list of things to do looked like this:
- Learn when each neighbor is not home, especially the one downstairs
- Use soundboard to surround the benchtop saw and router table motors
- Use rubber casters placed on rubber floor mats
- Mount the benchtop saw and the router to their cabinets with small rubber squares to absorb more vibration
- Use plywood below the rubber mats to help deflect sound
- Keep windows closed
- Get used to hand tools, and use a hand tool process first before turning to power tools ( I did lots of planing)
- Carefully plan the project’s order of operations so I would be ready to machine when the neighbors leave (have the saw & router blades and fences set up in advance)
Using the above list, I was able to come home from work during lunch and run boards through since my neighbors were at work. At night, I used hand tools, marked boards, and set up the machines. On weekend mornings, my downstairs neighbor went to the gym, so I got more stuff done.
I was able to minimize the table saw and router table noise enough to keep my one adjacent neighbor from hearing more than vacuum-level noise. This was accomplished by keeping the bedroom door closed, using soundboard-lined cabinets, and the other techniques mentioned above.
Controlling dust was my second biggest issue. As you know from “Before You Build Your Dream Woodshop”, I used a handheld Dustbuster and a shower curtain to minimize dust. This turned out to be marginally effective, so for my next shop (and when I saved more money) I bought a dust collector right away.
Because this was an apartment with limited time to work, I learned more by slowing down and methodically thinking through each step. This developed better habits than I would have rushing the projects.
This is why knowing (and listing in writing) what your ideal woodshop should be is so important. Each time I saved some money I referred to the next highest priority on my list and took care of it. I tried (and sometimes failed) to resist buying too many doodads from the woodworking store that had little impact on my day to day woodworking efficiency and quality. I learned to focus on the big stuff first. I still get my doodads, but only after I’ve solved a major shop frustration.
1-Car Garage Shop
My second woodshop was in a rather skinny one-car garage space. There was another bay, but they were offset from each other, and my roommate parked the car there most of the time. I saw it as a step up from my apartment bedroom shop, so I was pretty excited.
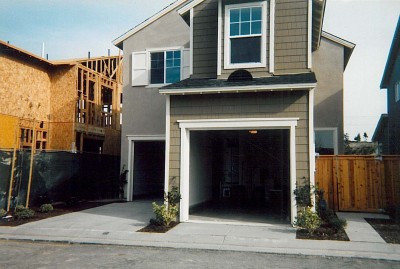
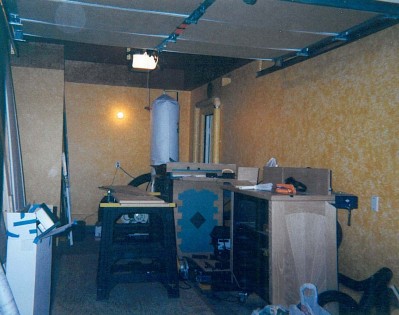
My one-car garage shop (right bay). All machines were placed against the right-hand wall, leaving just enough room to do assembly and benchwork.
After adding two layers of drywall, my sound problem was nearly gone. I bought a dust collector, so I didn’t have to evacuate the shop for 10 minutes after cutting MDF. These were the biggest issues I faced in my first shop, so they were my first priority in my second. Now my obstacles were lack of project staging space, lack of room for ideal workflow, and not having the proper stations for each process.
Creating Space in a 1-Car Garage Shop
Since space was at a premium, I did a “spring cleaning” every few weeks, throwing away any wood scraps that were less than a foot long (except a few exotic wood pieces), removing tool cases that were empty, and gathering up not-so-often used tools in labeled clear plastic boxes. I tried to keep tools related to the router table at the router station, and table saw jigs at the table saw on shelves under the saw. At the time, I had sawhorses with plywood as my workbench in the middle of the floor so I could access all four sides.
In a shop like this, clutter could get out of control quickly, since so many things were “out for use” rather than put away. So I created bins for painting supplies, electrical items, drilling tools, fasteners, hand-cutting tools, etc. so that everything had a home. When things got messy, I’d spend a few hours dusting everything off and putting them away to reset. This kept me sane enough to complete projects and still want to come back to the shop the next day.
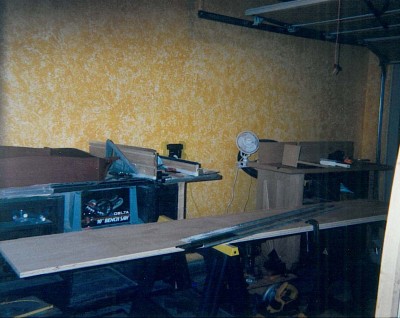
There was barely enough room to work so to preserve floor space I had to store most things out of the workflow.
WoodChip Tip: Find an “out-of-the-workflow” spot for garden supplies, plumbing tools and parts, electrical repair items. I plan on making an outdoor cabinet for all gardening and plumbing supplies so they’re not even in the shop. This applies especially to small shops. Build a shed for non-woodworking stuff if you can.
I made a wall cabinet for finishing supplies to get them off the floor. Once I did that, a light bulb went on in my head. Why not use wall cabinets to get all kinds of things off the floor? This works if you don’t have to reach over machines to get stuff, so putting these where they’ll be accessible is important. Floor space was at a premium, and not being able to walk around without stepping over something was critical.
My benchsaw and router table cabinets were on locking castors, so I could move them if I needed outfeed room, or if I needed to set up a make-shift bench.
If I had to use the 1-car garage shop for years to come, I would have built “transformer” workstations to save space but to minimize set-up time. That kind of ingenuity challenge can be fun, so don’t be too down on your shop because it’s only one bay.
WoodChip Tip: I also limited the amount of lumber I stored, after a large cabinet project’s materials took up most of my assembly area. I saved money, too, because I wasn’t buying wood I “might” use later on.
Due to lack of shop width, I couldn’t create ergonomically friendly machine clusters so I added that to my list of future requirements. It was with this one-car garage shop that inspired me to sit down and list all the criteria I wanted for a woodshop. Once that design outline was done, I figured I would maximize my next shop by prioritizing and doing as many of those improvements as possible.
Wherever You Are
Regardless of where you are, you can do woodworking. While in my apartment I considered getting a membership at a local Woodcraft-associated shop, but ultimately decided to set up shop at home so I could have access to woodworking more often. If you have access to a small basement, one-car garage, or small outbuilding, just list the main concerns you have and address them one at a time. You can design your way out of almost any problem. So remember this the next time you figure there’s nothing you can do but wait.
Leave a comment below and tell everyone where your first shop was, and how you did woodworking despite not having a “full dream shop”.
Connect with me on Facebook, and follow me on Twitter for more ninja tips to Optimize Your Woodshop!
Gotta get more clamps,


 How I went from a cluttered and disorganized shop to a super-productive layout with a convenient dust collection and electrical set-up.


