Written By Bobby. On Nov 08. In Design Process,Starting? Go here!,Workshop Layout
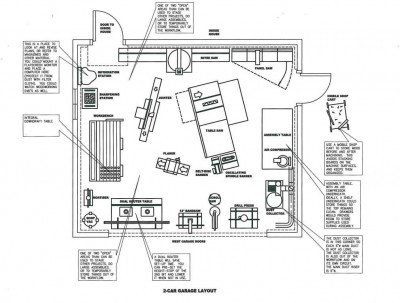
This 2-car garage was designed when I wasn't sure what type of space I'd have next. But, it was easily adapted to a 3-car garage shop later on.
In the previous post, Shop Space Where You Are: Part I, we looked at not letting your location or life situation stop you from woodworking, and what work-arounds you can use to make it happen. Just do what it takes, even if the amount of time and energy required surprises you. We also reviewed 1-car garage shops, and I shared what I did with my 1-car space.
If you’re currently designing a shop for where you are, or your eventual dream shop, check out my previous posts, “Revolutionize Your Woodworking Enjoyment, Part I”, “Revolutionize Your Woodworking Enjoyment, Part II”, and “Revolutionize Your Woodworking Enjoyment, Part III”. Let me know what else you would like me to explore so you can have a more complete design.
2-Car Garage Shop
Now, when I started my woodshop design effort I never imagined I’d have more than a 2-car garage so I used that as my basis. But, I made the design criteria general enough that I could adapt it to any future shop. A refined and updated version of this outline is yours (free)—just sign in to the right to download a PDF version of the Woodshop Design Outline.
I kept filling in each category with exact details—stuff to buy, specific things to design and build, and things to consider for each station, and any other solutions to frustrations I made note of.
My top priorities for a 2-car garage were to establish good workflow and to provide plenty of project staging and assembly space. I had neither in my 1-car garage shop. So, I divided the space into a stock breakdown area for long boards and panels, milling area (S4S, and sizing), a wood shaping and joinery area, and an assembly area. I decided I would do finishing outside and maybe in an out-building later on. Each station would be mobile, because I may need to alter the layout mid-project, or as I obtained new tools.
When I did a to-scale layout of a typical 2-car garage, 22 ft. by 18 ft., and played around with the layout, I discovered it would still be tight. I had to carefully decide which tools would be in the workflow, and which tools were not used enough to be within easy reach. There were quite a few compromises from my “ideal” for a 2-car garage shop. I also realized that there were some tools I wouldn’t be able to fit, such as a large drum sander, lathe, and 20” resaw bandsaw. I was thinking that I could, if space allowed, extend my garage by cutting a doorway to the outside and building a small “shed” around that, basically an addition. This could house some “extra” tools that I could roll into position if I really needed them. Again, a compromise, but that will always be to some degree. The magic happens when you don’t compromise on the few categories that have the biggest impact on what you do day to day.
3-Car Garage Shop
When I was finally ready to buy a house, I took advantage of my shop experience and recent design efforts and sought after a 3-car garage instead. At first I thought a 2-car garage would be enough, but after drawing it all to scale and then walking a few during my house-hunt, I noticed that I wouldn’t have much room to maneuver or to stage a large cabinet project. So I looked only at houses in my price range that had 3-car garages.
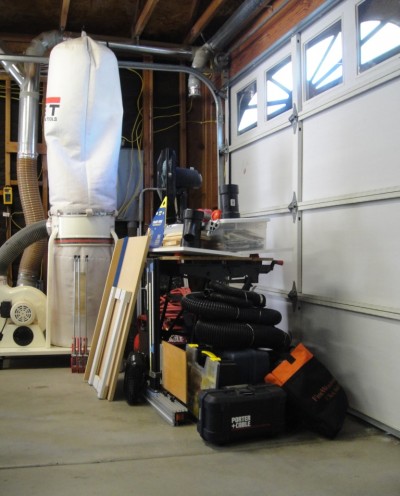
The difference between a 2-car and 3-car garage is the extra maneuvering room you’ll have, plus you can add luxury machines like a drum sander, 2nd bandsaw, 2nd assembly table, etc. without overcrowding your space.
I got lucky and spotted one for sale that had a totally open (no posts in the middle) 3-car garage, and was affordable since the house portion was only 1,600 sq. ft. Once my offer was accepted by the owner, I started to modify my “ideal” design into one of reality. The extra room was quickly filled with multiple work areas, coupled with open areas for project staging.
Some Vital Lessons Learned
One thing I’ve learned so far is that having a mobile shop cart is extremely useful if you’ve got lots of room around each station. It allows you to process wood at each station without having to pile it up on the station next to it. But I was careful not to make a bunch of space-hogging carts if I didn’t absolutely need it, such as a clamp cart. I’d rather have the space.
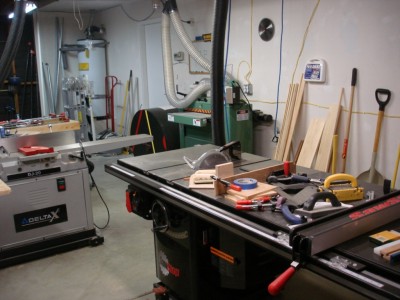
Now that I have a 3-car garage shop, I’m glad that I started work on my ideal woodshop design early. For now, I have rearranged this layout (to angle the machines better), and I’m currently making changes to my dust collection to accommodate it.
Another thing I learned is that I don’t want to bother putting the car in the garage; I’d rather use all 3 bays for woodworking. Having to move machines around each time I want to make something became a deterrent to using the shop. So, the car has evolved and adapted quickly to become an outdoor animal.
WoodChip Tip: If you’re going to do this for real (woodworking), you might as well go whole-hog, even if it scares you a bit to have a mega-shop in your garage. Put everything into your design that you know you’ll need to be successful in your own eyes.
Perspective
Take a “50,000 ft. view” of what you’re doing vs. what you would like to be doing. Is your current shop environment really supporting what you’d rather be doing? Is it minimizing the time you spend on things you’d rather not be doing?
Leave a comment below and tell everyone what you’re doing with your current shop, and what your plans are. The more we share the more everyone can enjoy the craft, and the more people can benefit from what we make.
Connect with me on Facebook, and follow me on Twitter for more ninja tips to Optimize Your Woodshop!
Gotta get more clamps,


 How I went from a cluttered and disorganized shop to a super-productive layout with a convenient dust collection and electrical set-up.




Hi My name is samuel, I have been in the construction industry for 15 years and have always used my garage as a shop, if it could be called that. . . Currently I have a garage with real rock walls and no concrete floor, it’s a mess to clean but I keep at it. A shop with concrete floors would be a dream. Im dreaming / planning for a 20×30 shop with 9′ ceilings and an upper loft for storage. I need some heating Ideas, was planning on a wood burning stove and maybe some kind of gas radiant heat. A good shop plan for tool layout would be nice
That’s awesome, Samuel–real rock walls! I love my concrete floor but it can be cold at times. I would like to do a wood floor or maybe a tile floor with radiant heat underneath. If you are able to build from scratch, run radiant heat tubes in the slab, then circulate hot water through them (hydronic heat). Once the slab warms up, it stays warm and doesn’t take much energy after that. Plus there’s no dust conflict w/a flame; the water heater/ boiler can be put outside or in a separate room. However, radiant hydronic heat is slower to react to the temperature demand than a gas or electric type heater.
Right now I’m using electric radiant heaters (two of them) but they’re not that effective. Gas radiant heaters would work well, but make sure they’re of the direct-vent, sealed combustion type (due to the dusty environment), such as the Hawt Dawg gas unit heater by Modine, where you suspend it from the ceiling. It takes either natural gas or propane. Plug in a carbon-monoxide detector while you’re at it just to be safe.
The best thing you can do besides that is seal and insulate your ceiling (minimum R-38) and walls (suggest R-15 if 2×4 and R-19 if 2×6). Plus good weather-stripping @ the doors. My leaky doors are a big source of lost heat.
With a wood-burning stove you don’t really have a control with a thermostat, so that may be an issue, and I wouldn’t store any flammable finishes or do any finish work with an open flame in the area. Dust clouds can ignite as well.
For the 3-car sized shop layout, see the link below. My shop is also about 20’x30′. In my earlier posts I walk through my thinking process for how I arrived at this layout (see links in this article). I started with workflow, drew it all to scale, then went through my most common tasks in real life, and made notes on the drawing until I was happy. Then I re-drew it and designed the dust collection layout and electrical layout from that. It’s still a work in progress (isn’t it always?)!
Link: Current Shop Layout