Written By Bobby. On Oct 14. In Design Process,Starting? Go here!,Workshop Layout

If you nag yourself to revamp your woodshop every day, but don't know where to start, begin with a list of your ideal shop criteria on paper.
Are you so focused on day-to-day woodworking that you’re tolerating major inconveniences? Are you “chewing around the edges” with small shop projects but wanting to eat the whole pie of a dream woodshop? It’s easy to experience a frustration, then forget about it a few minutes later. Have enough of those and your hobby and your passion get lost in a sea of annoyances. This series of posts will show you how to comprehensively design your woodshop and prioritize each element, and walk through all the important considerations so you can be confident you’re not working on an already-obsolete project.
Spend an hour a day dedicated to your ideal woodshop design, and revolutionize your shop time! Start with imagining your shop as a blank slate. Question everything.
WoodChip Tip: Take everything out of your shop so you can get an unbiased view of your space and how it should be used. Not only will this be a great “spring cleaning”, the main benefit is that your ideas will flood out of your brain. Have a notepad ready to catch it all. Writing it down, even on scratch paper, has a way of making you slow down and think about what you’re designing.
Now we’ll look at some of the critical elements you’ll need to pay attention to in your workshop design.
Location
Knowing your future woodshop location is useful. If you’re staying put for a while then it makes sense to plan major upgrades to your walls, electrical systems, etc. However, if you plan to build a separate outbuilding (or move altogether), then focus on your layout, each station’s design, small shop projects, and dust collection. Of course, that doesn’t mean that doesn’t mean you can’t begin designing your dream woodshop now so you can get building as soon as you change locations.
I began my design when I lived in an apartment, confident that I’d have a 2-car or 3-car garage. I initially designed for a 2-car garage, but ended up buying a house with a 3-car garage. Luckily all I had to do was modify my floor plans, dust collection plans, and lighting plans. I could easily adapt this to a larger outbuilding if I moved in 10 years. I still update my design as I learn new cool ideas and tricks.
Workflow
 Knowing how you most often work will largely dictate your shop layout. Your typical workflow is unique, so it isn’t necessarily a good idea to copy someone else’s layout, despite the pretty colors in that magazine plan. Many articles suggest you start by locating your table saw in the center of your workshop, and then place the remaining tools against the wall or around the table saw. Buy why confine yourself to what’s popular if it does not fit your workflow?
Layout
The overall station layout in conjunction with workflow is probably the most important consideration, since from there you will be able to understand and design your electrical layout, lighting needs, and dust collection system. Use the PDF file entitled Woodshop Workflow Diagram below to list your desires in each category of your woodshop. My design started out as a mindmap, then translated into an outline and workflow diagram, I expanded on that to include more detail requirements (wish-list), then used that as a guide to generate sketches, and finally more formal drawings. A list of sketches you could generate is provided in the other supplement file, List of Design Drawings To Generate, to use as a reference.
While some machines should be mobile (on locking castors or some other mechanism), all station locations should be located on a plan since provisions for electrical, dust collection, and stock outfeed/ infeed requirements will need to be provided for. Aim for a layout where your stations stay in one position most of the time. I found it annoying to keep moving machines around for every operation because they were placed improperly to begin with.
WoodChip Tip: You might have to accommodate a car, so use quick-connect fittings on dust collection hoses to minimize the pain of moving equipment.
If you have an accurate, scale drawing of your shop, including walls and doors, you are in business. If you don’t, you can make a few assumptions if you know what kind of shop you will eventually have. Ideally, you will have only woodshop-related items in your shop-space, but if you have to store some garden equipment, a car, and other items, that needs to be planned for.
Stock Prep (Milling Process)
Start by placing your raw lumber stores. Some keep this in an outbuilding, or want their working stock inside the woodshop, and some may store it in the house. Imagine yourself taking a board or sheet from this location to the first tool you will need to further break it down. If it’s a long board, it will be a miter saw or a radial arm saw. If it’s a sheet, it may be the table saw, panel saw, or a sawhorse with a circular saw. That “station” should be closest to either the door your stock enters the shop, or right near the lumber rack. Think about how you will maneuver from your lumber storage to the machine, and how each is oriented to minimize turning around with large stock in hand.
Next, think about the tool you use to refine your rough-cut raw stock most commonly. You might take that board you just rough-cut for length to the jointer, and joint one edge and one face. I’d place my jointer so that I could easily turn from my first most commonly used tool in the process (maybe the miter saw) and run it through the jointer from right to left.
From there, you might want to put the board through the planer, jointed face down. That would mean that the planer should be positioned such that you can take the board off the outfeed side of the jointer and easily move to place it on the infeed table of the planer. Positioning the machines at different angles is very helpful – think ergonomics. Just leave enough room to maneuver and for stock outfeed/ infeed. Outfeed/ infeed zones can cross each other provided both machines won’t be used at the same time.
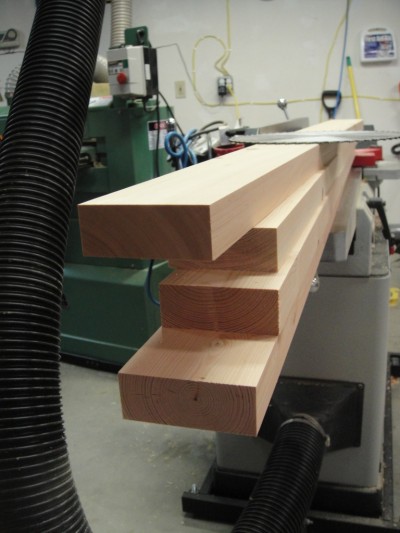
Having a "cluster" of machines where you perform a common process will save a lot of walking around the shop.
WoodChip Tip: Cramped for space? Try using folding infeed /outfeed tables on some machines, and/or match the height of adjacent stations for extra stock support.
From the planer, you may want to take the board to the table saw to trim it to width, and maybe trim it to final length. So the table saw might want to be near the planer for that reason, and oriented for convenient access from the planer outfeed. Being the largest space-hog in the shop, the table saw may have to be placed toward the middle of the shop, so that may affect the planer and jointer locations.
WoodChip Tip: Leave room for a mobile shop cart. As you run pieces through one machine, you can stack them on the mobile cart, then roll it to the next station. That eliminates having to find a spot to stack the pieces you’re working on.
From the table saw, you may go back to the jointer to straighten the edge you just cut on the table saw, which is the final piece to the milling process puzzle. Don’t be surprised if it takes several mock trials to get this right. Also don’t be shocked if your machines wind up at weird angles. If these machines are on castors already, you can temporarily disconnect the dust collection ducts and plugs, and roll them into different positions to see what works best. Well worth the time.
Now that you’ve completed the milling process, it’s probably time for shaping and/or joinery operations. This will be the subject of the next post.
Right now, take 20 minutes and hand-sketch the overall outline of your current or future shop, including door and window locations. On another sheet, list what equipment you plan to have. Then, think about your typical workflow, and start lightly sketching in your first machine locations based on your unique workflow diagram.
WoodChip Tip: You can use paper cut-outs of each machine or a CAD program to make it easier to try different scenarios. Remember to rotate the tools to best suit how you want to move from task to task.
Now look at infeed/ outfeed, and how much room you will need a the beginning and end of a cut. Then, imagine yourself walking and trace, with your finger, your operations as you go from station to station to make sure you have a good, simple path. Being able to turn around and be right at the next station is nice.
When you have a chance, take your rough sketch into your shop and physically play-act your way through your processes. Record your ideas and “lessons learned” onto your sketch with a different color pencil or pen.
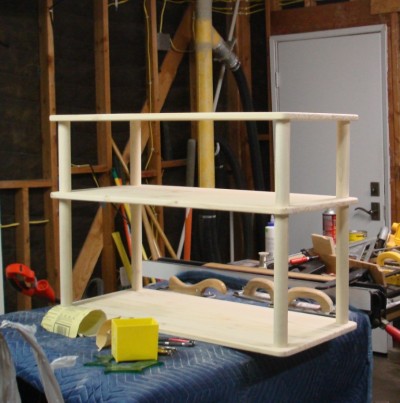
Go through a typical project, and test your layout until you are satisfied. Incorporate those locations on your plan.
Remember, your workflow is your most important consideration. Avoid the common mistake of overly compromising your workflow-friendly layout in favor of convenient duct collection or a conventional layout you’ve seen. Design a layout that works for workflow. The rest of your design, including dust collection duct routing and electrical outlet locations, should then be designed around your layout, not the other way around.
Leave a comment below and tell everyone what did you learn from your sketch when you actually walked it in your shop?
Click on the links below for the free supplements to this post:
List of Design Drawings To Generate.PDF
Connect with me on Facebook, and follow me on Twitter for more ninja tips to Optimize Your Woodshop!
Gotta get more clamps,
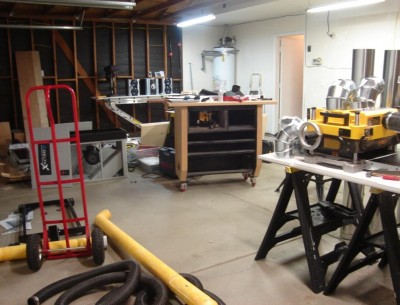


 How I went from a cluttered and disorganized shop to a super-productive layout with a convenient dust collection and electrical set-up.




OMG! I envy you in a good way!
Just looking a that plan seems such a nice idea, I mean I just love working with wood and metal and having that place just for you is a dream!
Thanks, Fernando! To me, freedom to pursue my creativity is my goal, so I am driven to set up shop to maximize that. I see your blog is about leaving the 9-5; I think there has to be a “resulting feeling” you can go to in your mind to keep our motivation going.
For me that’s the ability to do woodworking and other art. As Tim Ferriss says, when you do achieve your freedom, you should “fill the void” with things that excite you, whether it’s traveling, art, or gardening. I say even if your freedom is limited by a 9-5, still spend some time with the things in life that you’d do if you had total freedom. Don’t wait!