Written By Bobby. On Nov 18. In Design Process,Starting? Go here!

A Sheet Index is your starting point of organizing your design drawings. Put them in a logical order to start and you’ll know what to fill in to give yourself a complete set of instructions when it comes time to build.
Drawing your workshop design on scratch paper might seem like it’ll save you time, but it will cost you. Organizing your drawings will ensure you’re thinking of all the things you need to build an effective shop. Plus, it doesn’t really take that long to set up your drawing sheets. It’s mostly copy and paste. Really.
As an engineer, I work with architects every day. In the building industry, all design drawings are organized to best suit the project. This drawing “set” is submitted to the City, and ultimately to the contractor to build. Because the drawings are categorized in a familiar way, any question the contractor has is answered by the Sheet Index. This is list of each drawing sheet by number and title.
- “How many bathrooms does this theatre have?” I’ll look at Sheet A-1.01 First Floor Plan.
- “How many AC units will I need to buy?” I’ll look at the Mechanical Roof Plan, Sheet M-1.03 and the Equipment Schedules, M-0.01.
- “What type of water heater will I need to install?” I’ll look at the Plumbing Equipment Schedule, Sheet P-0.01.
Without this organization of drawings you’d get lost in the jumble of content. Once you really get into your design, you’ll see that there are a lot of sheets needed to really describe your design.
Yeah you have your floor layout, but you also need your dust collection system ductwork routing, electrical outlet plan, ceiling plan, floor covering plan, wall elevations (where do your cabinets and racks go, and how does it look), each station (what does your router table look like from all sides?), and many other “views” you’ll want to sketch. What does each wall look like when viewed from the side (this is your wall elevation)…you probably have at least 3 walls to plan out. Soon you’ll have a set of drawings to think about what you need to put in them.
How to Organize Your Design Drawings
Most Architects organize their sheet index by starting with the “big picture” view, and then move closer and closer to fine detail. They’ll often start with a Cover Sheet (name of project, address, small reference map, name of developer, and contacts of all the designers and engineers). The next sheet (General Notes) may be filled with lists, charts, and text describing code requirements, special city ordinances, charts of room names and functions, parking space calculations to meet code, occupancy category and number for each space, and many other handy reference items used by the City and contractors to check for compliance and to help with cost estimating.
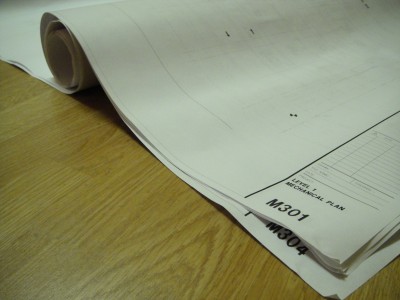
Each drawing will have a title, and a page number, such as “FP-1” meaning “Floor Plan”, and you can have multiple floor plans, such as your machine layout floor plan, storage floor plan, and finished-floor plan showing your wood or tile floor for example.
The first “plan” sheet might be an overall site plan, showing how the building is positioned on the plot of land and the surrounding streets. The Civil Engineer may show how the land slopes, and the basic street utilities available to the building for connection. You might even include landscaping. The scale is still too big to show much detail of what’s going on inside the structure. So, the next sheet may show just the building itself, zoomed in a bit to show the space plan layout. Within this plan, there may be “call-out bubbles” that refer the reader to go to an “Enlarged Plan” for more detail on certain things. If there is a bathroom with a lot of plumbing fixtures, the overall plan may refer you to a specific sheet to see a larger view of the bathroom. Additionally, this bathroom has a certain placement of each sink, mirror, and molding on each wall. This will be shown on the Wall Elevations.
Then, the Enlarged Plans may still refer you to Details, such as how the toilets should be installed. These Details may apply to all or some of the toilet installations. There may be more than one detail, if you have both wall-mounted and floor-mounted toilets for example.
The designers can keep adding more elements to the sheet set until they have fully described what they intend to be built.
WoodChip Tip:
Sometimes you need to show what something looks like when you slice it in half. This is called a section view. You can show things that would be otherwise hidden with “outside” views.
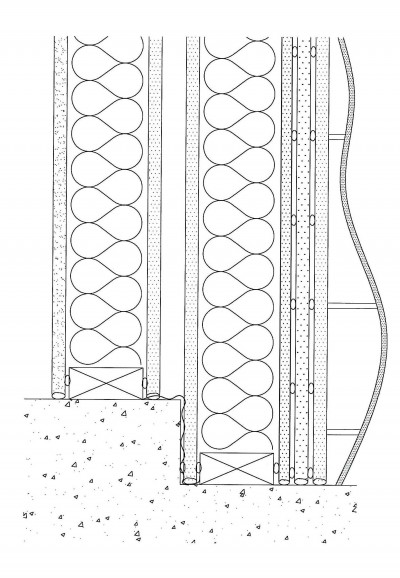
A Section View can show what layers go into a wall, for example. It gets you to think about the step-by-step fabrication of something in the right order such as drywall, insulation, and framing. You can do the same thing to a cabinet or piece of furniture.
How to Show Everything Without Confusion
There will also be times when a certain view would become overcrowded and unreadable if you showed everything at once. So, you have to think of things in different categories as “layers” that you display one at a time.
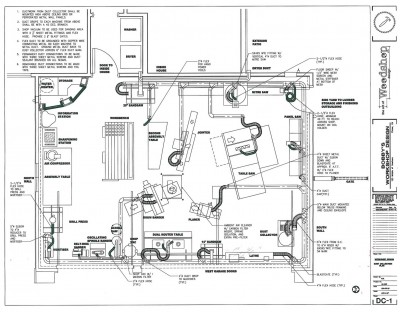
For example, say you have a floor plan that shows your machine and tool station layout with some text describing each. Then you might include another floor plan that shows your dust collection duct layout, with text just describing things like duct sizes, blastgate locations, etc. On this same plan you’d show your machines so you know where the ducts are going to, but you’d omit the text describing the machine stations so it doesn’t get too cluttered. Another plan may show your electrical outlet locations and the lines connecting each separate circuit. Then, another floor plan may show just the ceiling elements, such as your lighting and overhead air cleaner.
If you have a Cad program, such as AutoCad Full Version or AutoCad LT, you can do this easily by drawing everything on the same floor plan, but drawing the different elements on separate layers. This allows you to freeze and thaw layers at will, depending on what you want to see and print out. If you are drawing/ sketching by hand, you can draw your floor plan once, photo copy it, then draw in the specific elements you want to show. You can also hold these papers up to a light and see how they overlay each other. Perhaps a light table would be useful here.
Most furniture drawings show the piece by giving you at least three views. One Top View, and usually two side views. Some give you an isometric (3D) or even an “exploded view”. You can employ these same methods to help you visualize what you’re designing. This is especially true with your station designs, such as your workbench or planer stand. By playing with the design you can, for free, experiment with different ideas before building. However, keep in mind you can only go so far with detail. You’ll have go figure some stuff out while constructing it.
How to Start
Begin your design drawing by mindmapping your Sheet Index. From there, draw templates you’ll use for multiple sheets, such as your sheet border (with your title-block containing the sheet title and #), your floor plan, wall elevations, etc. Once you have those copied to their relevant sheets, you can continue to fill in your design. Stop and think every so once in a while about what affects what, and what you’re willing or not willing to compromise on. For example, if you move something on one sheet, does it affect what another sheet shows?
Start setting up your drawings set as soon as you can. Once you do, you’ll find it hard to stop yourself from adding to it because it’ll be a lot easier than you thought.
Click on the link below for the Sheet Index I’m using for my woodshop design.
Connect with me on Facebook, and follow me on Twitter for more ninja tips to Optimize Your Woodshop!
Gotta get more clamps,


 How I went from a cluttered and disorganized shop to a super-productive layout with a convenient dust collection and electrical set-up.


