Written By Bobby. On Nov 05. In Workshop Layout
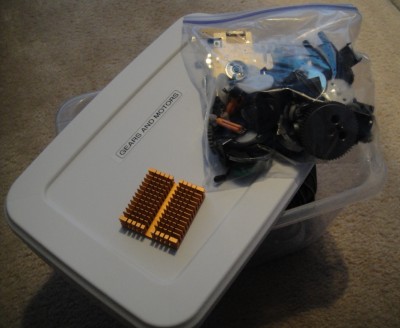
Small items are probably the most critical to round up and put in a container where you can find stuff. In this box, I even used a sealed bag to store some parts separate from others to reduce the amount I’d have to sift through.
There’s more to storage than plopping stuff on shelves in a particular order. If I have all of my oil finishes together doesn’t mean my shop flows well. Thinking more “big picture”, or strategically, about your shop storage will sync with the woodshop layout you worked so hard to get perfect.
After all, what good is ergonomically arranging all of your tools if you have to traipse across the shop just to get a marking gauge?
Take a minute here and let me comb your mind towards having the same consistent philosophy for workshop storage as you do your woodshop’s layout.
Once you have an overall philosophy (design principles), your woodshop design should come together much quicker because you’ll have a guide.
Categorize Your Stuff by Station, Not Just Function
If you think about it, most people’s instinct is to store their tools just by their function. All screwdrivers together, all chisels together, all measuring and marking stuff in one place, etc.
But, if you think about it some more, you use your tools at a workstation. If I’m at my assembly table, I want to be able to access anything I want while I’m there. I want to do the same thing while I’m at my workbench too.
But if all of my chisels are at the workbench, and I need to touch up an inside corner with a chisel while at the assembly table, I have to walk over to get it. Instead, I’d rather have at least one chisel dedicated to the assembly table.
So, my rule is to FIRST categorize tool needs by STATION, and only after that categorize them by function. In other words, at a given station, I’ll group like tools together, but I won’t do that for the overall shop because that runs counter to good workflow.
This may mean you’ll be duplicating some tools; three screwdrivers, several hammers, etc. But that’s a good thing. Really. I do that and it’s awesome.
Accessibility Level
You ever notice that you take out a tool, use it for the day, then feel obligated to “put it back” only to take it out again? So eventually you just leave it on your bench anyway. Ok, but that can get in the way if you always have a bunch of stuff on the bench. So, just change what “put it back” means. Make it easy.
Have a rare earth magnet hold some tools just underneath the bench on the legs (not the table edge), so it’s easy to clear the top rather than walk over to a “tool wall” (which I’m generally against, which I’ll discuss more below), or create a recessed tool well in your bench. Lower shelves below horizontal surfaces are a big help.
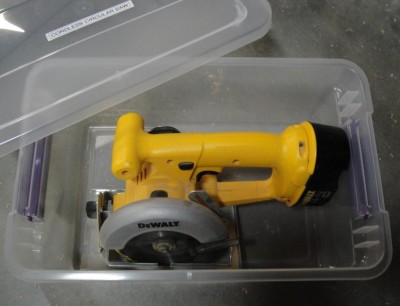
I don’t use this very often, so I keep it in a clear plastic box. That way I can see it’s there, and it’s protected from dust.
Things that you access every day or almost every day need different treatment than something you only use every 6 months. But you knew that. The idea here is to actually list them so you can design around it. You also don’t want to store rarely used items so out-of-sight that you forget you even have them.
My woodshop design calls for three levels of accessibility:
- Use Every Day
- Use Occasionally
- Seldom Use (but still want it available)
Often-used items get the premium real estate. This means at a location from waist to eye level. Occasionally used things are put down lower. I like reaching high the least, so things that I don’t use much at all are put up higher if a station is against the wall. For tool stations located more in the middle of the shop, I may add drawers or shelves on the sides or “back” of the station.
WoodChip Tip: Don’t forget to protect what you store from dust. But not everything needs to be “hidden”. You can use clear plastic boxes, cabinets and even drawers with windows. Some things that are easy to brush off I simply keep out in the open for better accessibility. But things with a lot of complicated shapes that are hard to “de-dust” I protect in a drawer or a box of some sort.
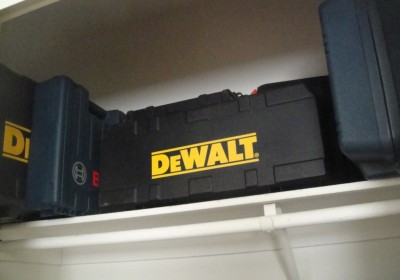
Things like the useless plastic boxes a lot of tools come in get stored on high shelves in the house. Are there things in your shop that really don’t need to be there? Perhaps you could build something to contain all those garden tools...
What to Carry With You
There are a few (very few) items that I use at almost all workstations, and they happen to be light enough that I can put them on my regular pants belt. I reach for those when I enter the shop, so they’re mounted on the wall next to the door so they’re easy to grab.
These include:
- Dust Collector Remote
- Marking knife or pencil (for me, a mechanical pencil)
- Measuring device (for me, a tape measure and small ruler)
- Safety Glasses and Ear Protection
- Small clip-on pouch for misc. stuff like screws or plugs
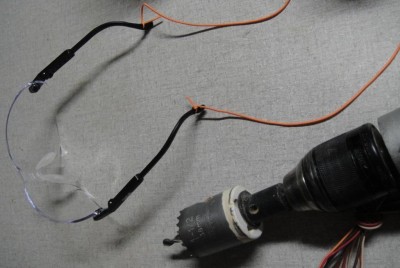
Drilling a small hole in the arms of your safety glasses and threading a cord through it will help keep you from searching for them every 10 minutes. A pocket would work too, especially if you have a shop apron.
Some people like having a shop apron, others maybe a tool belt. I just adhered a belt clip to the pouch and a keychain to the remote and it works well. My safety glasses and hearing protection have a cord on them so they can go around my neck when I’m not using them.
If you find that you use something constantly, consider keeping it on you, and design a way to conveniently carry it.
Shop Cart Storage
If something is too bulky or heavy to carry around, you could store it at a shop cart. A shop cart is a good way of transporting stock from one machine to the next, where you sort wood on its way into the machine from wood that was just machined. Things like a speed square, engineer’s square, some chalk, or a small block or shoulder plane would be helpful to have at the ready as you’re running boards through several tools.
But be careful that you plan your shop cart with a purpose. Don’t just add a bunch of shelves to store miscellaneous items just because you can. Make sure the shop cart serves a focused function and that’s it.
Lumber Scraps
An often forgotten system you should have is a way to deal with offcuts and scraps at stations that generate them. If you just throw them on the floor you have a big mess to clean up, and now you have to sort between trash and treasure.
If you have a dual bin, one for trash and one for “keep”, you can throw them in the right bin as you go. Your shop will tend to stay cleaner since it’ll be easy.
I suggest you have these bins at the bandsaw, table saw, and miter saw.
What I Do in My House
Part of the reason for this post is I’ve recently completed an overhaul of my house storage. I caulked, sealed, and painted all of my closets. I even replaced several shelves with solid wood ones, because the builder-cheap MDF ones were sagging.
That got me really thinking about my overall strategy for storing stuff. My goals were:
- To make cleaning up fast at any time
- To create a tendency to keep the house clutter-free
- To make things easy to find, especially often-used things
- To get stuff out of sight that I didn’t use very often
Simply put, if you pile your mail on a table every day, but sorting and putting billing statements and other records away is difficult, you’ll tend to leave them there until it looks really crappy.
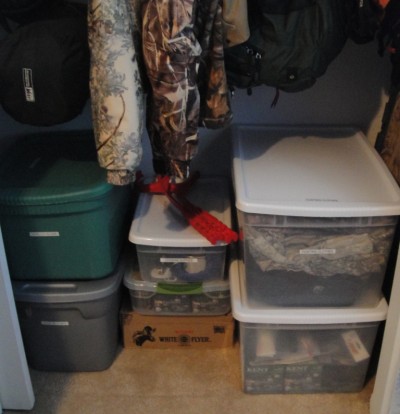
I can literally pack for an outdoors trip in a half hour; none of my gear is scattered around the house—it’s all here.
Things that are inconvenient to clean up will tend to stay messy. So I made all places I need to continually access at an easy-to-reach level, free of interference of other boxes.
If someone comes over to visit, I can clear table and counter surfaces of clutter in less than 20-30 minutes without dumping it all into an empty room and closing the door. Everything has a designated place now.
WoodChip Tip: Don’t micro-sort everything. Instead, macro-sort. If you attempt to put every little thing in alphabetical order, or try any other obsessive-compulsive system, you won’t finish your systems. Just get things that belong together stored together where they’re needed. There’s nothing wrong with a box of wrenches; as long as you know where they are and they’re located at the station where you need them. You don’t need to put them in size-order and have a cut-out space for each. If you must, do all the “micro-sorting” after all of your “macro-sorting” is done throughout the shop.
Now, if I need to find my camping gear, there are 4 clear plastic boxes with labels on them to look through, all next to each other. This is way better than one giant box, with some of the gear in other closets.
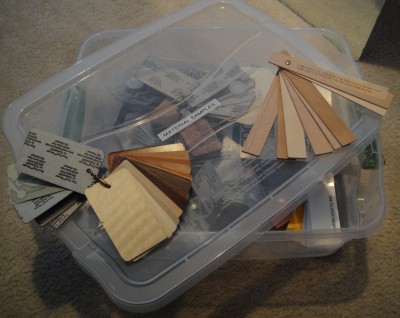
You may collect these from various trade shows or your suppliers. But do you use them? I have these in my art/ design studio. During a design, I flip through these to see what my options are.
Small Shops
I’m no stranger to small shops. I did woodworking from my apartment bedroom for a few years, had a 1-car garage bay in a house for 2 years, then an apartment 1-car garage bay (with a neighbor overhead!) for a few more years. Now I have a 3-car garage shop, which is about the right size space for me.
How did I deal with that limited space and still try to stick to the woodshop design principals I encourage here on this blog? What if you have to share your space with your wife’s car, a bunch of “misc.” storage?
I discovered there are only 4 main objectives you should focus on:
- Get non-workshop items out of shop if possible, and at least off the floor as out of the way as possible
- Protect what must be stored in the shop area from dust
- Each station must be mobile; locking casters are ideal here
- Absolutely minimize how much set-up and “transforming” you have to do to each station (i.e. minimize 6-in-1 workstations)
Like everything, the above is easier said than done, but you can go pretty far.
Household stuff stored in the garage or basement is usually “long-term” storage, and doesn’t need to be accessed very often. If that’s the case, create out-of-reach shelves for clear plastic boxes, high cabinets, or loft space.
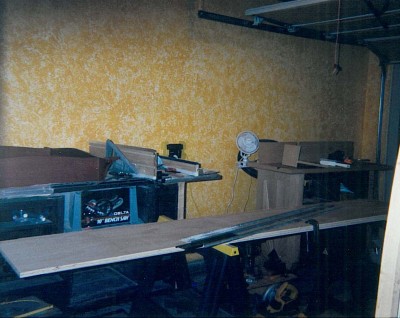
The one thing that limited space does is reduce the amount of horizontal table area. So, you wind up putting stuff on your table saw, router table, etc. I was constantly clearing off the table saw to make a cut. I used a lot more hand tools back then because I didn’t have room for a jointer.
If you have old baby furniture or toys in the garage, think about building an insulated shed in the yard, or adding some built-in storage inside the house. For quite awhile, I was storing all my plastic power tool cases in the shop; recently I added storage space inside my house and put them there. Now my shop has much more wiggle room. Also, until I build a garden shed, I put all the garden tools on one wall out of the workflow.
While it is tempting to engineer a complicated shop station with a rotating planer, flip-up spindle-sander, and router table extension, it just adds to your set-up time and becomes a deterrent to starting a project. I found that if I added up the time to extract tools from their hiding spot and set them up to use, it took over half of my shop time.
In my one-car garage shops I had a dedicated router table and a dedicated table-saw station, both on wheels. My workbench was plywood on saw horses. Along one wall, I just put each station there and rolled it out to use it, but I didn’t have to do anything else to get it ready.
Avoid These
This one is pretty simple. Just don’t do the following:
- Planer cart with 6 different shelves and drawers filled with things you don’t need for planing operations.
- Tool-walls far from your bench
- Wall-mounted tool cabinets far from your bench or assembly table
- Putting stuff in places that you have to take out again the next day
- Having to walk across the shop for something more than a few times
- Centralized storage (except for reserve supplies)
- Storage of all jigs in one place
- “Universal” cabinets to store all the shop’s loose stuff
- Clamp racks away from the bench or assembly table just because it’s easier to hang on the wall far away
- Allow storage of unrelated items at workstations
When I had a 1-car garage shop, distances to walk around were very short. Still, I didn’t like walking around the table saw or router table to get stuff that should’ve been where I was. So if you must have a wall-mounted tool cabinet, or a “tool wall”, make sure it’s right at your assembly table or workbench so everything is within easy reach. Because my workbench surface is away from walls (I like to walk on all sides), I don’t have a tool cabinet on the wall.
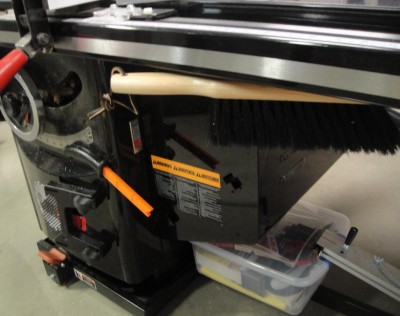
At my Table Saw station, I store as much as I can within reach. I find that rare-earth magnets work great for putting things away and keeping things highly accessible, even with one hand.
Currently, my assembly table is against the wall so my clamps are on the wall next to that. But my assembly table design has room for clamps underneath the table, reachable by one hand (assuming the other hand is desperately holding something together).
If I store things on the wall, they’re seldom-used items like long T-squares, plywood carry-handles, etc. I also have a magnetic strip near my shop entrance to my house where I put commonly used tools for around the house, such as a few mini-clamps, screwdrivers, and one chisel. This way I can just open the door, reach around and take what I need and go back inside.
If you just remember to decentralize your woodshop storage, you’ll find yourself achieving your designed workflow most of the time.
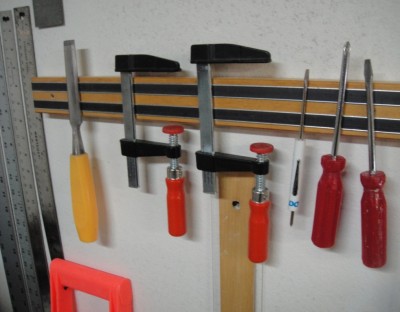
You can mount one of these almost anywhere. This one is right inside the entry door to the shop, so I can easily access things I commonly use around the house.
For more guidance in assembling your Woodshop Design, click on the Starting? Go Here! category and read those first.
Connect with me on Facebook, and follow me on Twitter for more ninja tips to Optimize Your Woodshop!
Gotta get more clamps,


 How I went from a cluttered and disorganized shop to a super-productive layout with a convenient dust collection and electrical set-up.




Brilliant notes! It occurred to me that before I do another workshop overhaul some insight on how others choose to do it might be helpful (genius right?) Anyhow, you nailed it, stuff I did’t ever notice before and extremely logical solutions to things most people glaze over. Thumbs up and Thanks!