Written By Bobby. On Jan 31. In Shop Systems,Workshop Layout
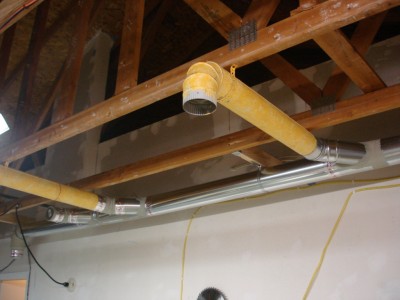
The location of these drops needs to be carefully planned. The mistake I made was not allowing enough clearance for long boards while crosscutting at the table saw when I first installed my dust collection ductwork.
I thought I had the perfect design. Everything seemed to flow, tools were arranged ergonomically, and everything had electricity and a dust collection connection.
Then I used that design in real life.
Most things were exactly what I imagined they would be like, but there were a few deficiencies I couldn’t ignore.
My table saw has a dust collection hose that goes up to the ceiling to keep it off the floor and out of my way, but the way it was ducted interfered with cross-cutting long boards. Another problem is the 240V outlet for the table saw and jointer was on the wall, but those tools were toward the middle of the shop. This meant that I had a cord in a walking path.
I added a General drum sander to my shop. Since it needs a 240V outlet, I didn’t have enough outlets so I constantly was unplugging the jointer every time I used the drum sander. Plus, since I needed to be close to the only 240V outlet, it wasn’t in the right location in the shop. I use it for final dimensioning after milling, and for flattening wide panel glue-ups. So it really wanted to be near the workbench but also near the planer.
I also realized I didn’t make any provisions for my future 18” or 20” bandsaw. If I bought one, it would be a pain in the butt retrofit my dust collection ductwork and electrical layout for it.
My list of frustrations and deficiencies was large enough to warrant doing a complete retrofit sweep all at once.
Temporary Solutions
If you’re a contractor retrofitting the air conditioning in an existing building, one of the first things you do is provide temporary air conditioning while the main system is being torn apart. For your shop, plan it so that you don’t have to stop woodworking while you do your retrofitting.
This means temporary set-ups. If you’re running new dust collection duct, and it’ll take a few days, make the connection last-minute so you don’t open up your existing system. The same is true with wiring. You can run the wire from the new outlet to the point where you’ll connect it at a new junction box to join an existing circuit. Right now I’m running additional 12 AWG Romex wire in several places but leaving some slack at the electrical panel so I can connect all of them at once so I don’t have to keep the power off for days at a time while it’s in progress.
My planer, since I moved it, is temporarily connected to my dust collection via a flex hose across the floor. That way I can use my shop while I’m installing the sheet metal ductwork overhead.
You can use a shop vac while setting up or retrofitting your main dust collector. You can use a temporary power strip on the floor for handheld tools before permanently mounting one on your workbench.
I have other temporary things going on as well, such as my workbench. It’s not the #1 priority to build my perfect workbench right now but I still need a workbench. So, two sawhorses and ¾” plywood with 2×4’s screwed to it works for now. For more on temporary set-ups, see the post The Value of Temporary Solutions.
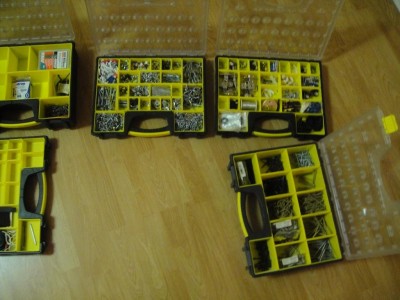
Eventually I’ll organize my fasteners at the Assembly Table, but for now this works well, and I don’t have to fish for the exact one I need.
Retrofitting a Design From Scratch
You may be in a situation where it makes more sense to do a clean sweep. When I moved in, I wasn’t quite done with my woodshop design, so I arrange my tools close enough to it. But I started with a blank slate 3-car garage. In my previous shop, a 1-car garage, I plopped the tools where the outlets were and used that for quite awhile. Then I started with a blank piece of paper to re-do that layout from scratch when I found myself not wanting to use the shop because it was tiring and frustrating.
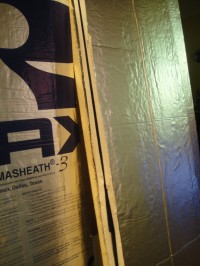
Before I close up the walls after adding insulation, I figure I better solve all the remaining problems I know about with the electrical and dust collection.
If your current shop layout evolved by putting new tools in the only available spots that didn’t have boxes or scrap lumber piled high with spider webs around it, you may want to start the design pretending there’s nothing in your shop at all. If you’ve got extension cords and power strips all over the shop, you really will benefit from an electrical re-do. It’s not very hard at all. I started with an A-B-C electrical how-to book with lots of pictures to figure out the basics.
If you’re using a shop vacuum that you wheel around from machine to machine, you’re putting up with a time-waster that you could do without. Every time I see a dust collector on wheels with a flex hose connected to only one machine in someone’s shop I think wow that must be really annoying.
If you have a good base to start with, meaning you’re already following a good design, then retrofitting from time to time will clear out the latest list of deficiencies.
Retrofitting Your Dust Collection System
If you already have a central dust collector, and you run ducts to each machine, you know how convenient that is.
I like to have my collector located in a corner, and I run a main duct (5” diameter for my CFM) along one wall and another 5” diameter duct along another wall. This splitting of the main duct with the collector in the middle keeps the main duct from being too long. So, if the blastgate is open on one of the two mains, the air only has to go along two walls back to the collector instead of around the whole shop. I didn’t want to put the main duct above my rafters through the middle of the shop because I want to do some decorative things to the ceiling that will block the path.
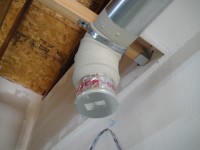
Provide yourself future duct connections by capping an extra elbow or wye fitting with foil tape that you can remove later and add a blastgate and flex hose.
Click HERE to see my current dust collection plan.
WoodChip Tip: Think of what the air has to do from a machine’s duct connection back to the dust collector. The less elbows and duct length you have the less resistance to airflow, which means more suction and less dust. Also, use long-radius elbows that have a curvature radius 1-1/2 times the duct diameter. Standard elbows have a curvature radius of only 1X the diameter.
Generally, I tap branches, usually 4” diameter, off of the main duct. If the machine is away from the wall, I run the branch overhead and then drop a flex duct in a place where it won’t interfere with me walking around or the infeed/ outfeed.
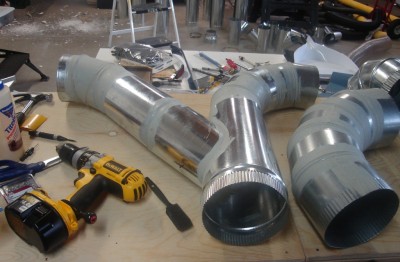
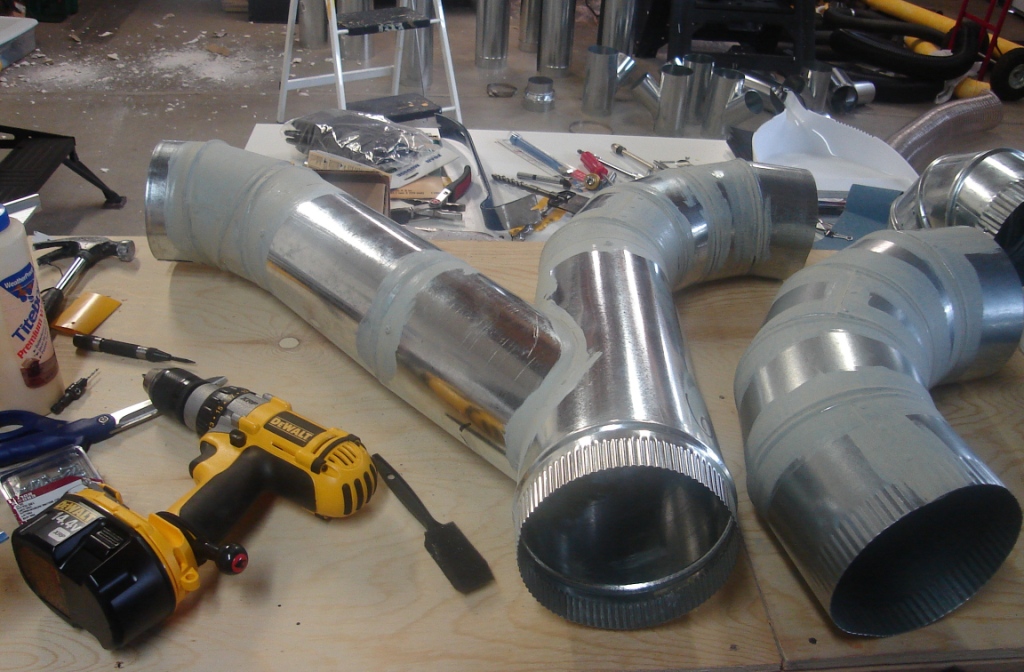
I processed each fitting with sealant, let it dry, then put together a few pieces at a time on the bench before strapping them up to the ceiling.
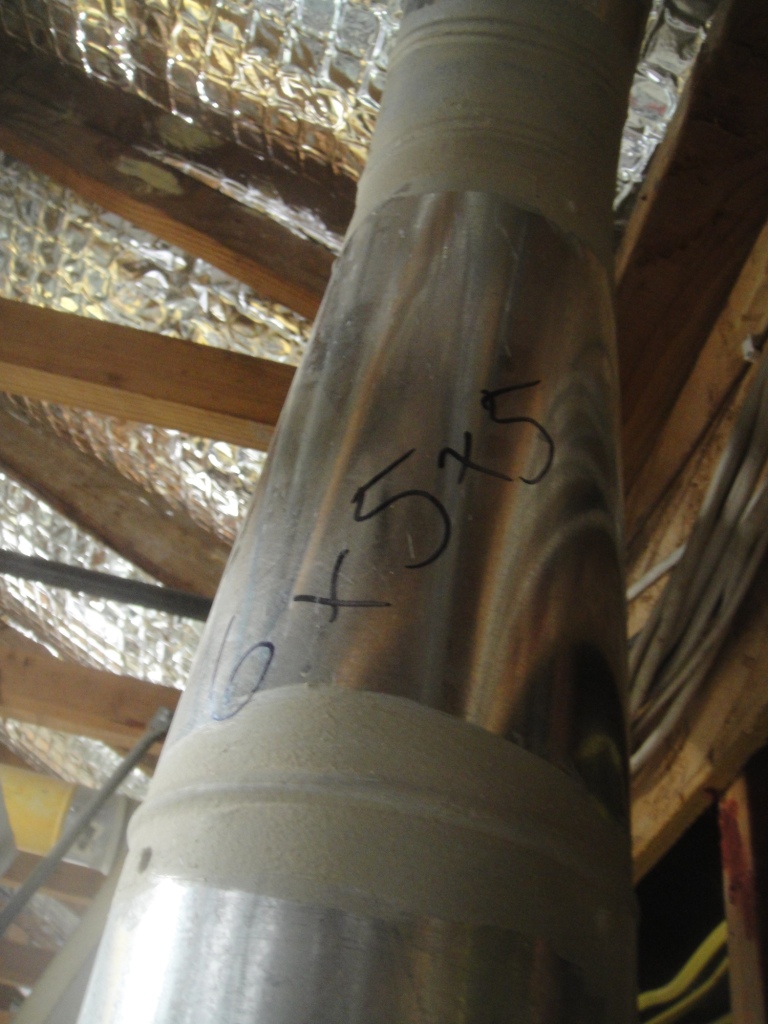
Because I’m moving the drum sander, and providing for the future resaw bandsaw, I’ll need to splice into the main and add a 45 degree wye fitting. I’ll be adding a ball fitting so that when I roll the drum sander around a bit it won’t put too much stress on the sheet metal duct and it will stay sealed. While I’m at it, I think I’ll add another branch over the workbench so I can have a flex hose reel to connect to sanders.
If you notice that there is a lot of space between two branch taps, you can always add one extra and cap it so you have some flexibility to adjust things later.
WoodChip Tip: Seal your ductwork with brush-on duct sealant for the joints and elbows you don’t think you’ll need to remove. For some joints, I used foil tape so I can disconnect and clean them out if I want. In all duct joints I used self-tapping sheet metal screws to join all the pieces together.
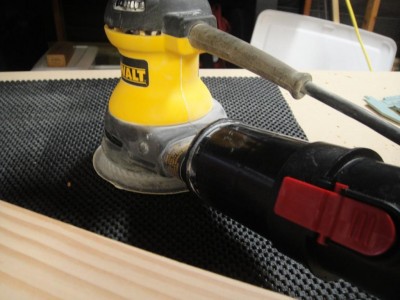
Don’t forget to add provisions for hand-held power tool dust collection. Whether you use a shop vacuum or your main dust collector, the important thing is you’re not ignoring it. The more convenient you make it to connect a sander to your dust collection the more likely you’ll use it.
Retrofitting Your Electrical System
In the last post, Wiring Up Your Shop, I walked through how I came up with my electrical plan. Once I decided what would go on what circuit, it was time to figure out where all the outlets would go.
The machines against the wall are easy; I just put an outlet that I can easily unplug while at the tool, and minimize the distance from the tool so the cord will reach. For machines that are toward the middle of the shop, I decided that I’d run the cord parallel with the dust collection flex hose to a ceiling outlet. But, I need to make sure that either the cord is long enough or make my own cord and wire it to the tool.
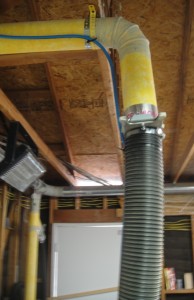
By running the power cord up to a ceiling outlet I avoid tripping over them causing a safety hazard. You do need to be careful that you leave enough slack so that you can move or rotate the machine in its mobile base without unplugging it!
Some woodworkers use floor outlets. Joseph P. Zeh at Swamp Road Wood Works for example has a plywood floor with an outlet right near the base of the jointer (scroll to Picture #68), and another one under the drum sander. The receptacle is facing sideways so dust won’t tend to fall in it. So if you have a wood subfloor, you can consider running electrical and even dust collection underneath (don’t forget radiant heating while you’re at it!). I, however, have a concrete floor so my outlets are either on the wall or the ceiling.
While accommodating my planned layout is good, I’m mindful of the future, where I may want to move things a bit. So, I allow for that somewhat by making sure there are enough outlets on each wall and in the ceiling. If there is too much space between outlets, then I can wire an extra one.
In the last post, I described the possible need for a second 240V circuit. Before I close up the walls, I’ll add the necessary wire (with enough extra slack) from the electrical panel area to the two outlets I’d like to be on this circuit, but I won’t connect anything. Instead I’ll put a junction box nearby so I can access it later. When the time comes where I want to hook it up, there might be a bit of drywall repair to get the wire to the outlets but it’ll be minimal. I’d sure hate to run that wire all the way back to the panel at that time.
Mock-Ups
For me, doing a mini-mock up where I put all the machines in their planned locations, and the future machines (using boxes) in place helped big time. I dimensioned their locations from the drawing and then went through all kinds of scenarios in the order I usually do them. I pretended to start at various stages of cabinet, small furniture, and large furniture projects to see how things flowed, and if I needed to change a tool’s location or angle (orientation).
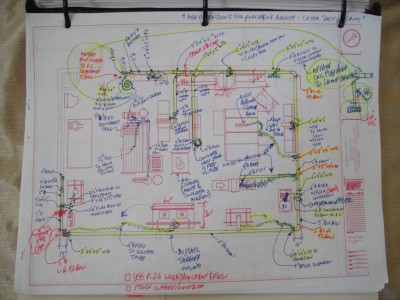
Design is a process. Start with your thoughts, list your requirements, then try it out to see if that’s what you really want. Then tweak the drawing until it flows for how you most often operate. This drawing looks a lot different than the one I’m currently using (click here for my current dust collection plan).
I made several changes which are now on my current floor plan. About 20 copies of my floorplan with red-pen notes and arrows later I arrived at what you see here. Sure, there may be changes in 3 years as I use the shop and evolve. But it’s as close as possible to the way I need it. That’s the key to this whole woodshop design thing. I think I’ve experimented enough that I’m comfortable committing to outlet locations and a specific ductwork configuration. Then I can move on to the shop envelope (insulation, doors, windows) and comfort (heating, cooling, fresh air, lighting), and then each tool station (storage, jigs, accessories).
One other change I made was move the future air cleaner toward the end of the shop (it was in the middle). This was because I read a tip online that suggested putting the air cleaner on one side to encourage a “racetrack” pattern to the air flow around the shop. Since I don’t have one yet, I’ll try this out when I get it and if it clears the air quickly then I’ll leave it there. If not, I’ll try another location and see if that works better. For now, I’ll put the outlet near where I show the air cleaner but run extra wire to allow me to relocate that outlet toward the middle of the shop if I need to.
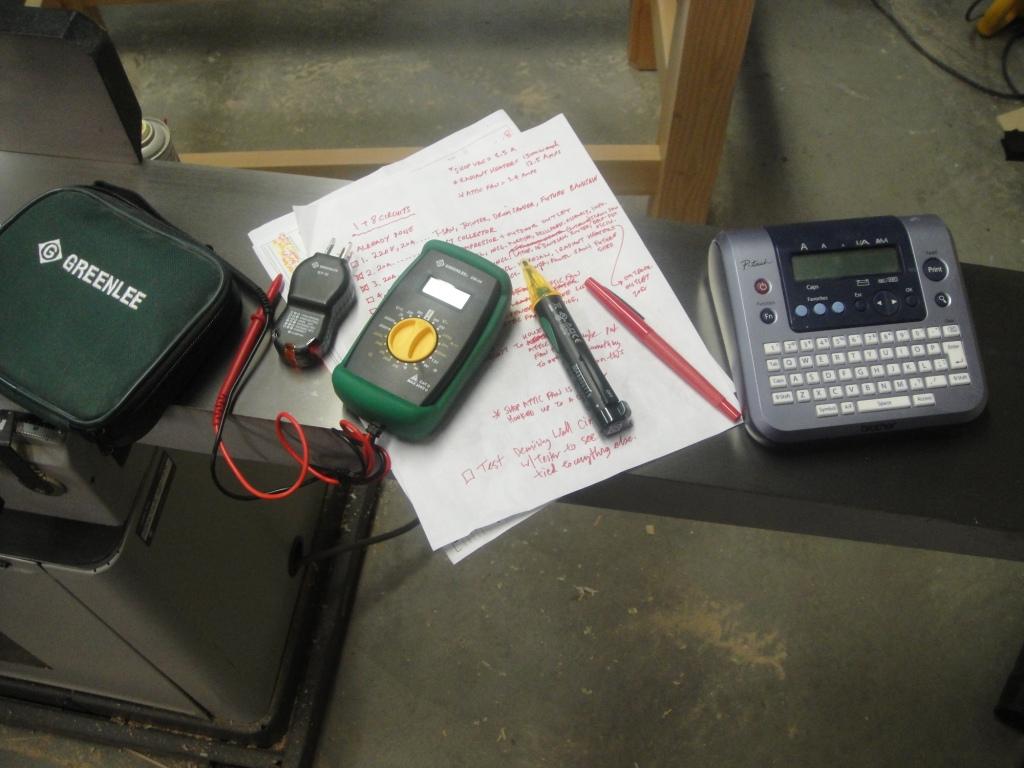
WoodChip Tip: If you want to do stuff like this on the weekend, do some prep for your retrofit during the week beforehand, such as measuring for how much wire and duct you need, list the parts to buy, then stop by the store or order on Amazon.com or Rockler. Then, you only need to do the labor portion on the weekend and if it takes longer than you thought at least you don’t have to spend precious Saturday hours planning and buying all the materials.
Are you happy with your electrical and dust collection systems? Do you need a complete overhaul or just some adjustments? How about this weekend?
PDF of my Dust Collection Plan
Connect with me on Facebook, and follow me on Twitter for more ninja tips to Optimize Your Woodshop!
Gotta get more clamps,


 How I went from a cluttered and disorganized shop to a super-productive layout with a convenient dust collection and electrical set-up.


